
Browse the manual
Put a form on your website
Configure an embedded form, allow your website and keep its responses in Made with Pepper.
On this page
For: an owner who collects inquiries through an existing website.
Where: Work > Forms > Widgets. On a phone, open More, then Forms.
Before you start: use HTTPS for your installation and website. Sign in as an Owner or Admin with form-management permission.
An embedded form keeps responses in the same business records as an ordinary form. The website receives no submitted values or internal record links.
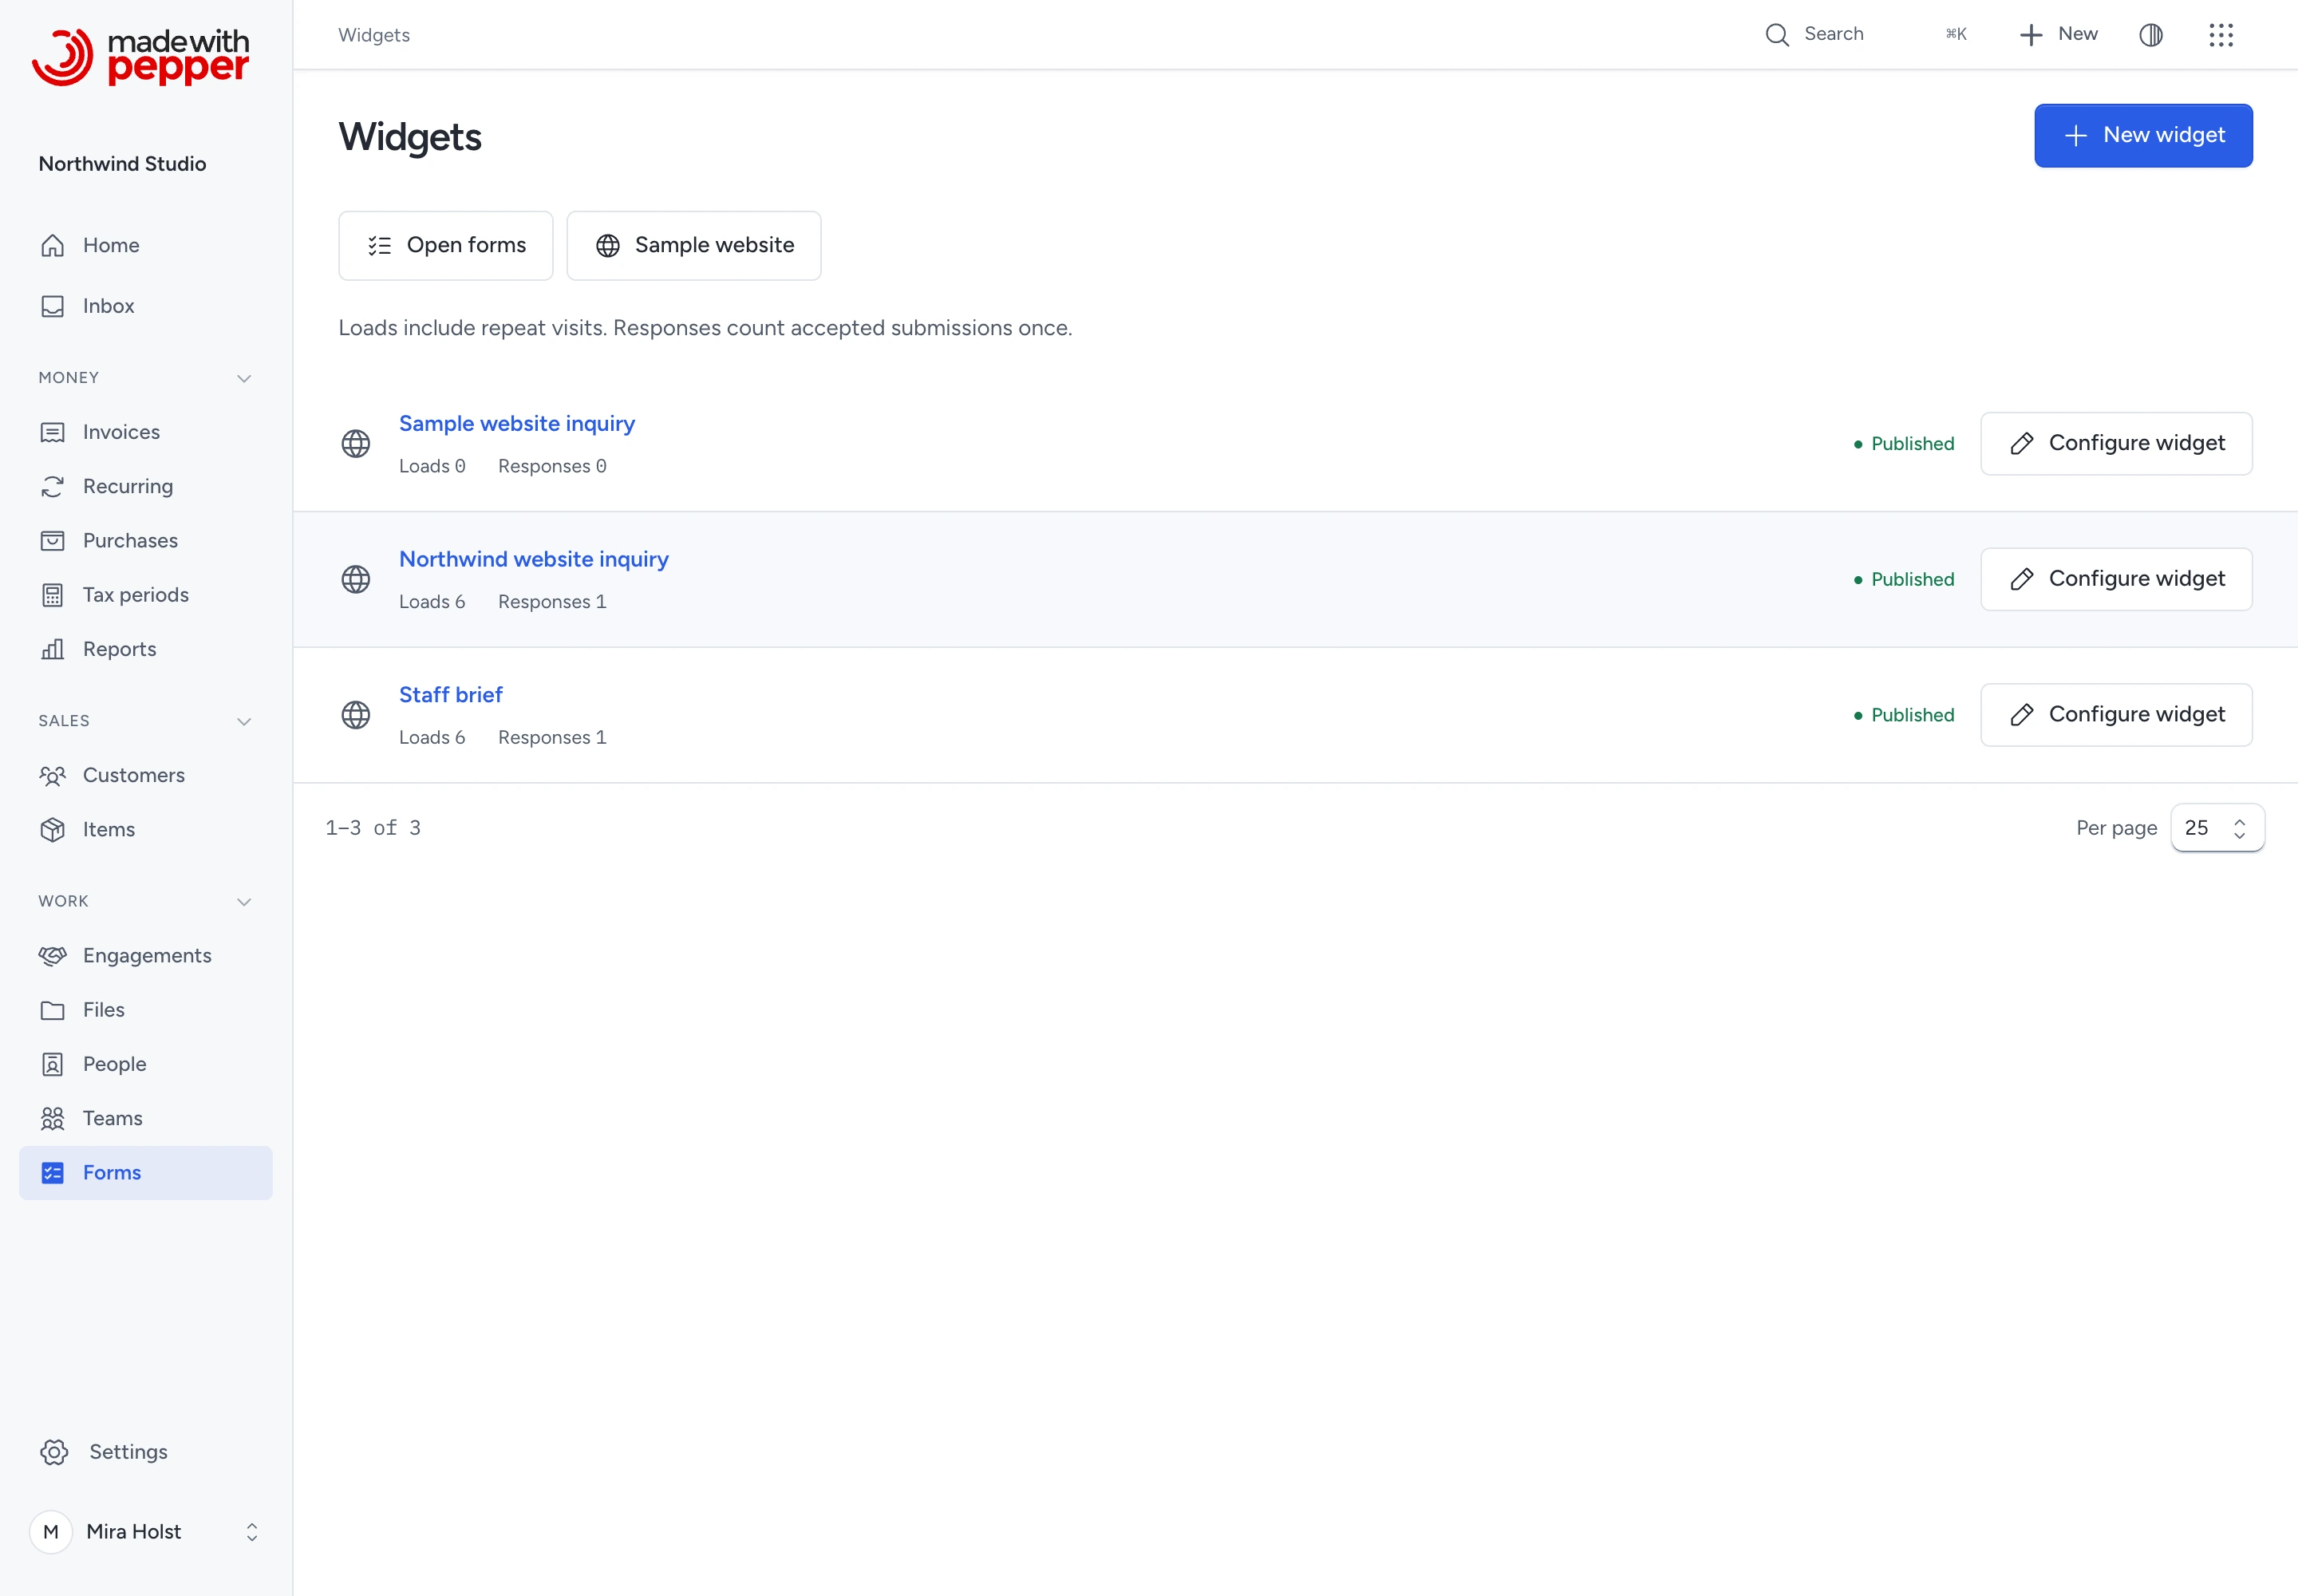
Choose a form
- Open Forms.
- Create a form with Response record as its target.
- Add its fields and consent statement.
- Click Save.
- For a public form, click Publish form.
- Open Widgets.
- Click New widget.
- Enter the Name.
- Select the Form.
The first widget supports response forms without Linked record fields. It cannot update customers or existing responses.
A public form needs no account. An internal form requires an active staff account with Use internal forms permission. Guests cannot sign in.
Use the forms guide for field types, exact amounts, conditions, consent and private file limits.
Configure the website
- Enter each website origin on a separate line under Allowed websites.
- Set Language.
- Set Appearance.
- Enter a 6-digit hexadecimal Brand accent, such as
#2B5CE6. - Set Show the form title.
- Check Enabled.
- Try the fields under Live preview.
- Click Save changes.
- Click Publish widget.
- Click Copy code.
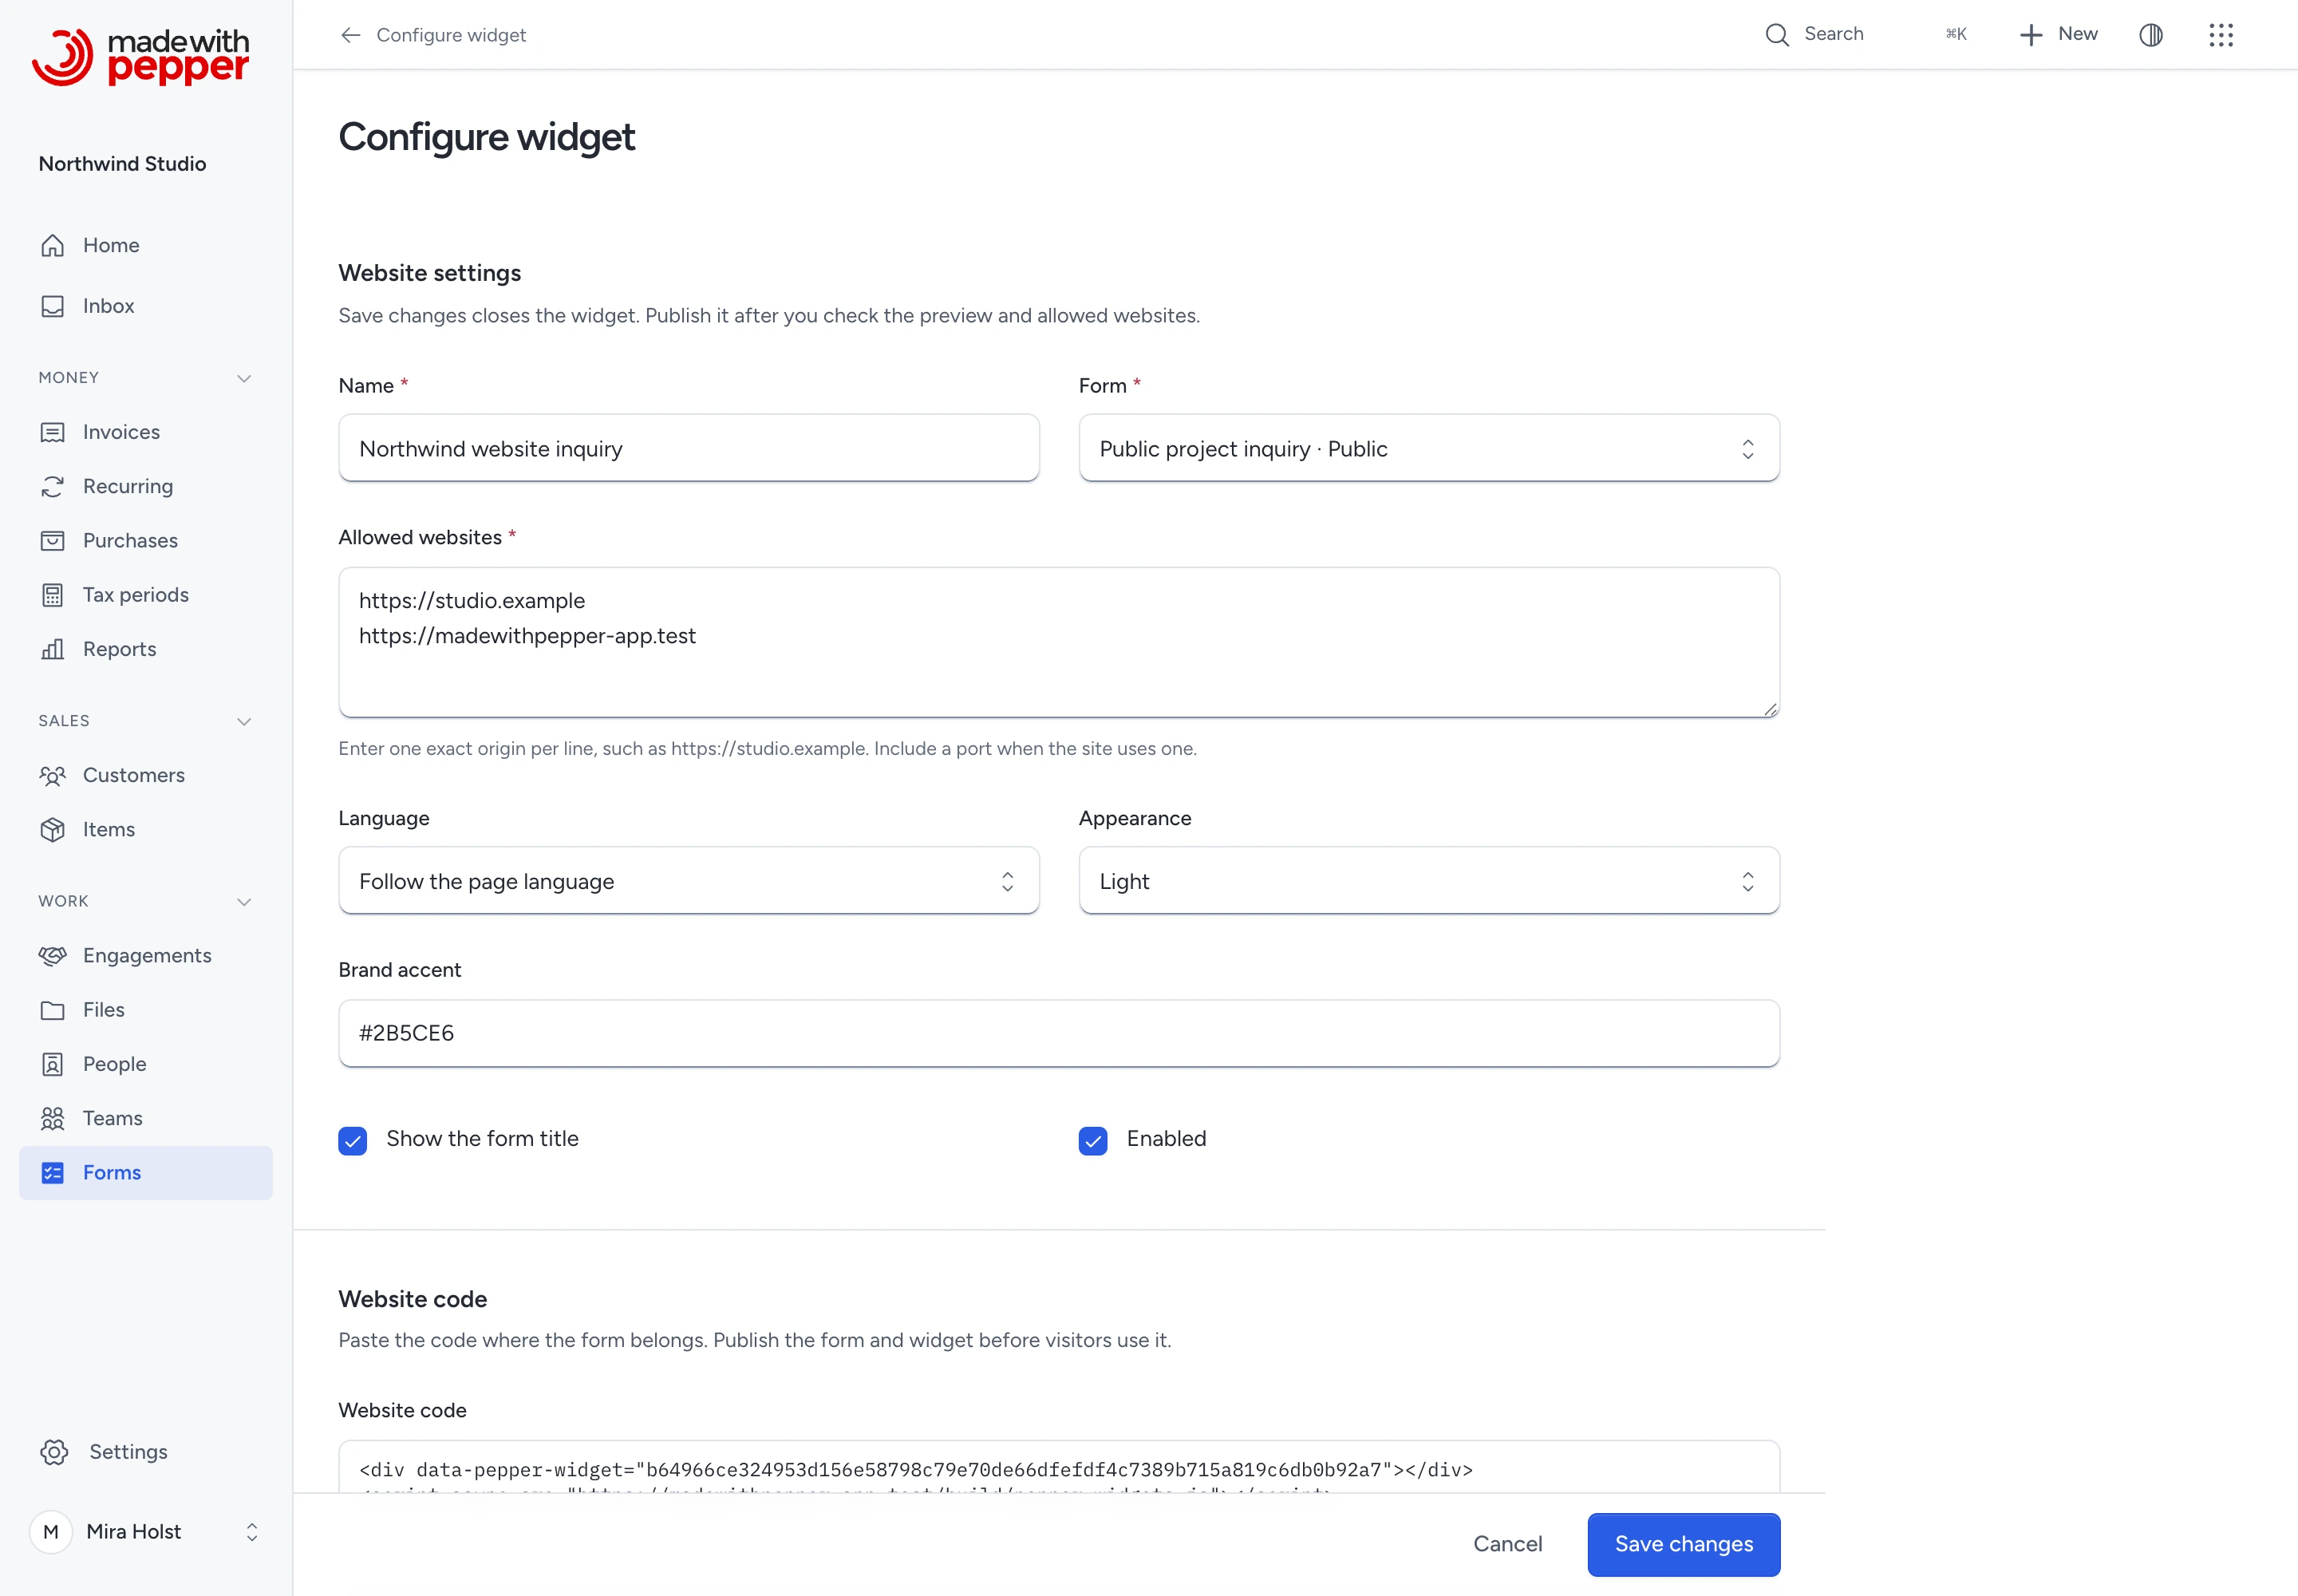
Use an exact origin such as https://studio.example. Add a port only when your website uses one.
Do not enter a path, trailing slash, login, wildcard, query or fragment. https://studio.example/contact is invalid.
List https://www.studio.example and https://studio.example separately when both serve the form. Localhost and loopback testing may use HTTP.
New widgets start disabled and closed. The brand accent starts from your company PDF color. The default appearance is light.
Follow the page language reads the website's HTML lang value. A supported base language matches its available locale. Other values use English.
A fixed language overrides the page. Form labels keep the text you wrote. All product controls support the 13 installation languages.
Follow the page theme uses the visitor's preferred color scheme. It does not read your website's CSS theme class.
The preview changes with these settings and uses ordinary form controls. It creates no response.
Paste the code
The copied code contains a placeholder and one script. Use the exact code from your installation.
<div data-pepper-widget="YOUR_WIDGET_KEY"></div>
<script async src="https://pepper.example/build/pepper-widgets.js"></script>
Replace the example address and key with the copied values. A widget key identifies the form; it is public.
| Website | Where to paste the copied code |
|---|---|
| Plain HTML | In the page body where the form belongs |
| WordPress | In a Custom HTML block; your account must permit scripts |
| Shopify | In a Custom liquid section or a theme template that permits scripts |
| Webflow | In a Code Embed element on the page |
Your website plan, editor permissions or security policy may refuse scripts. If the editor removes the script, use its permitted theme or code area.
Save and preview the website through its ordinary publishing controls. Open the actual website origin to test the form.
The script loads a widget near the viewport. It uses local installation assets and a separate iframe for the form.
Allow a strict security policy
If your website sets Content Security Policy, allow your installation origin under these directives:
script-src 'self' https://pepper.example;
style-src 'self' https://pepper.example;
connect-src 'self' https://pepper.example;
frame-src https://pepper.example;
Merge these sources into your existing policy. Keep the other sources your website needs. Replace the example origin with your installation origin.
The host snippet requires no inline script or inline style permission. The installation frame restricts its parent websites to the widget's allowed origins.
If your server adds X-Frame-Options to every response, exclude the /embed/ responses from that server rule.
Keep the application's frame policy. A conflicting proxy or server policy can block the iframe even when the widget configuration is valid.
Test and read a response
- Open the website in a separate browser.
- Fill the form.
- Select a currency for each money field.
- Check the requested consent.
- Click Submit form.
- Wait for Your form was received.
- In Made with Pepper, open Forms > Submissions.
- Open the kept submission and its response record.
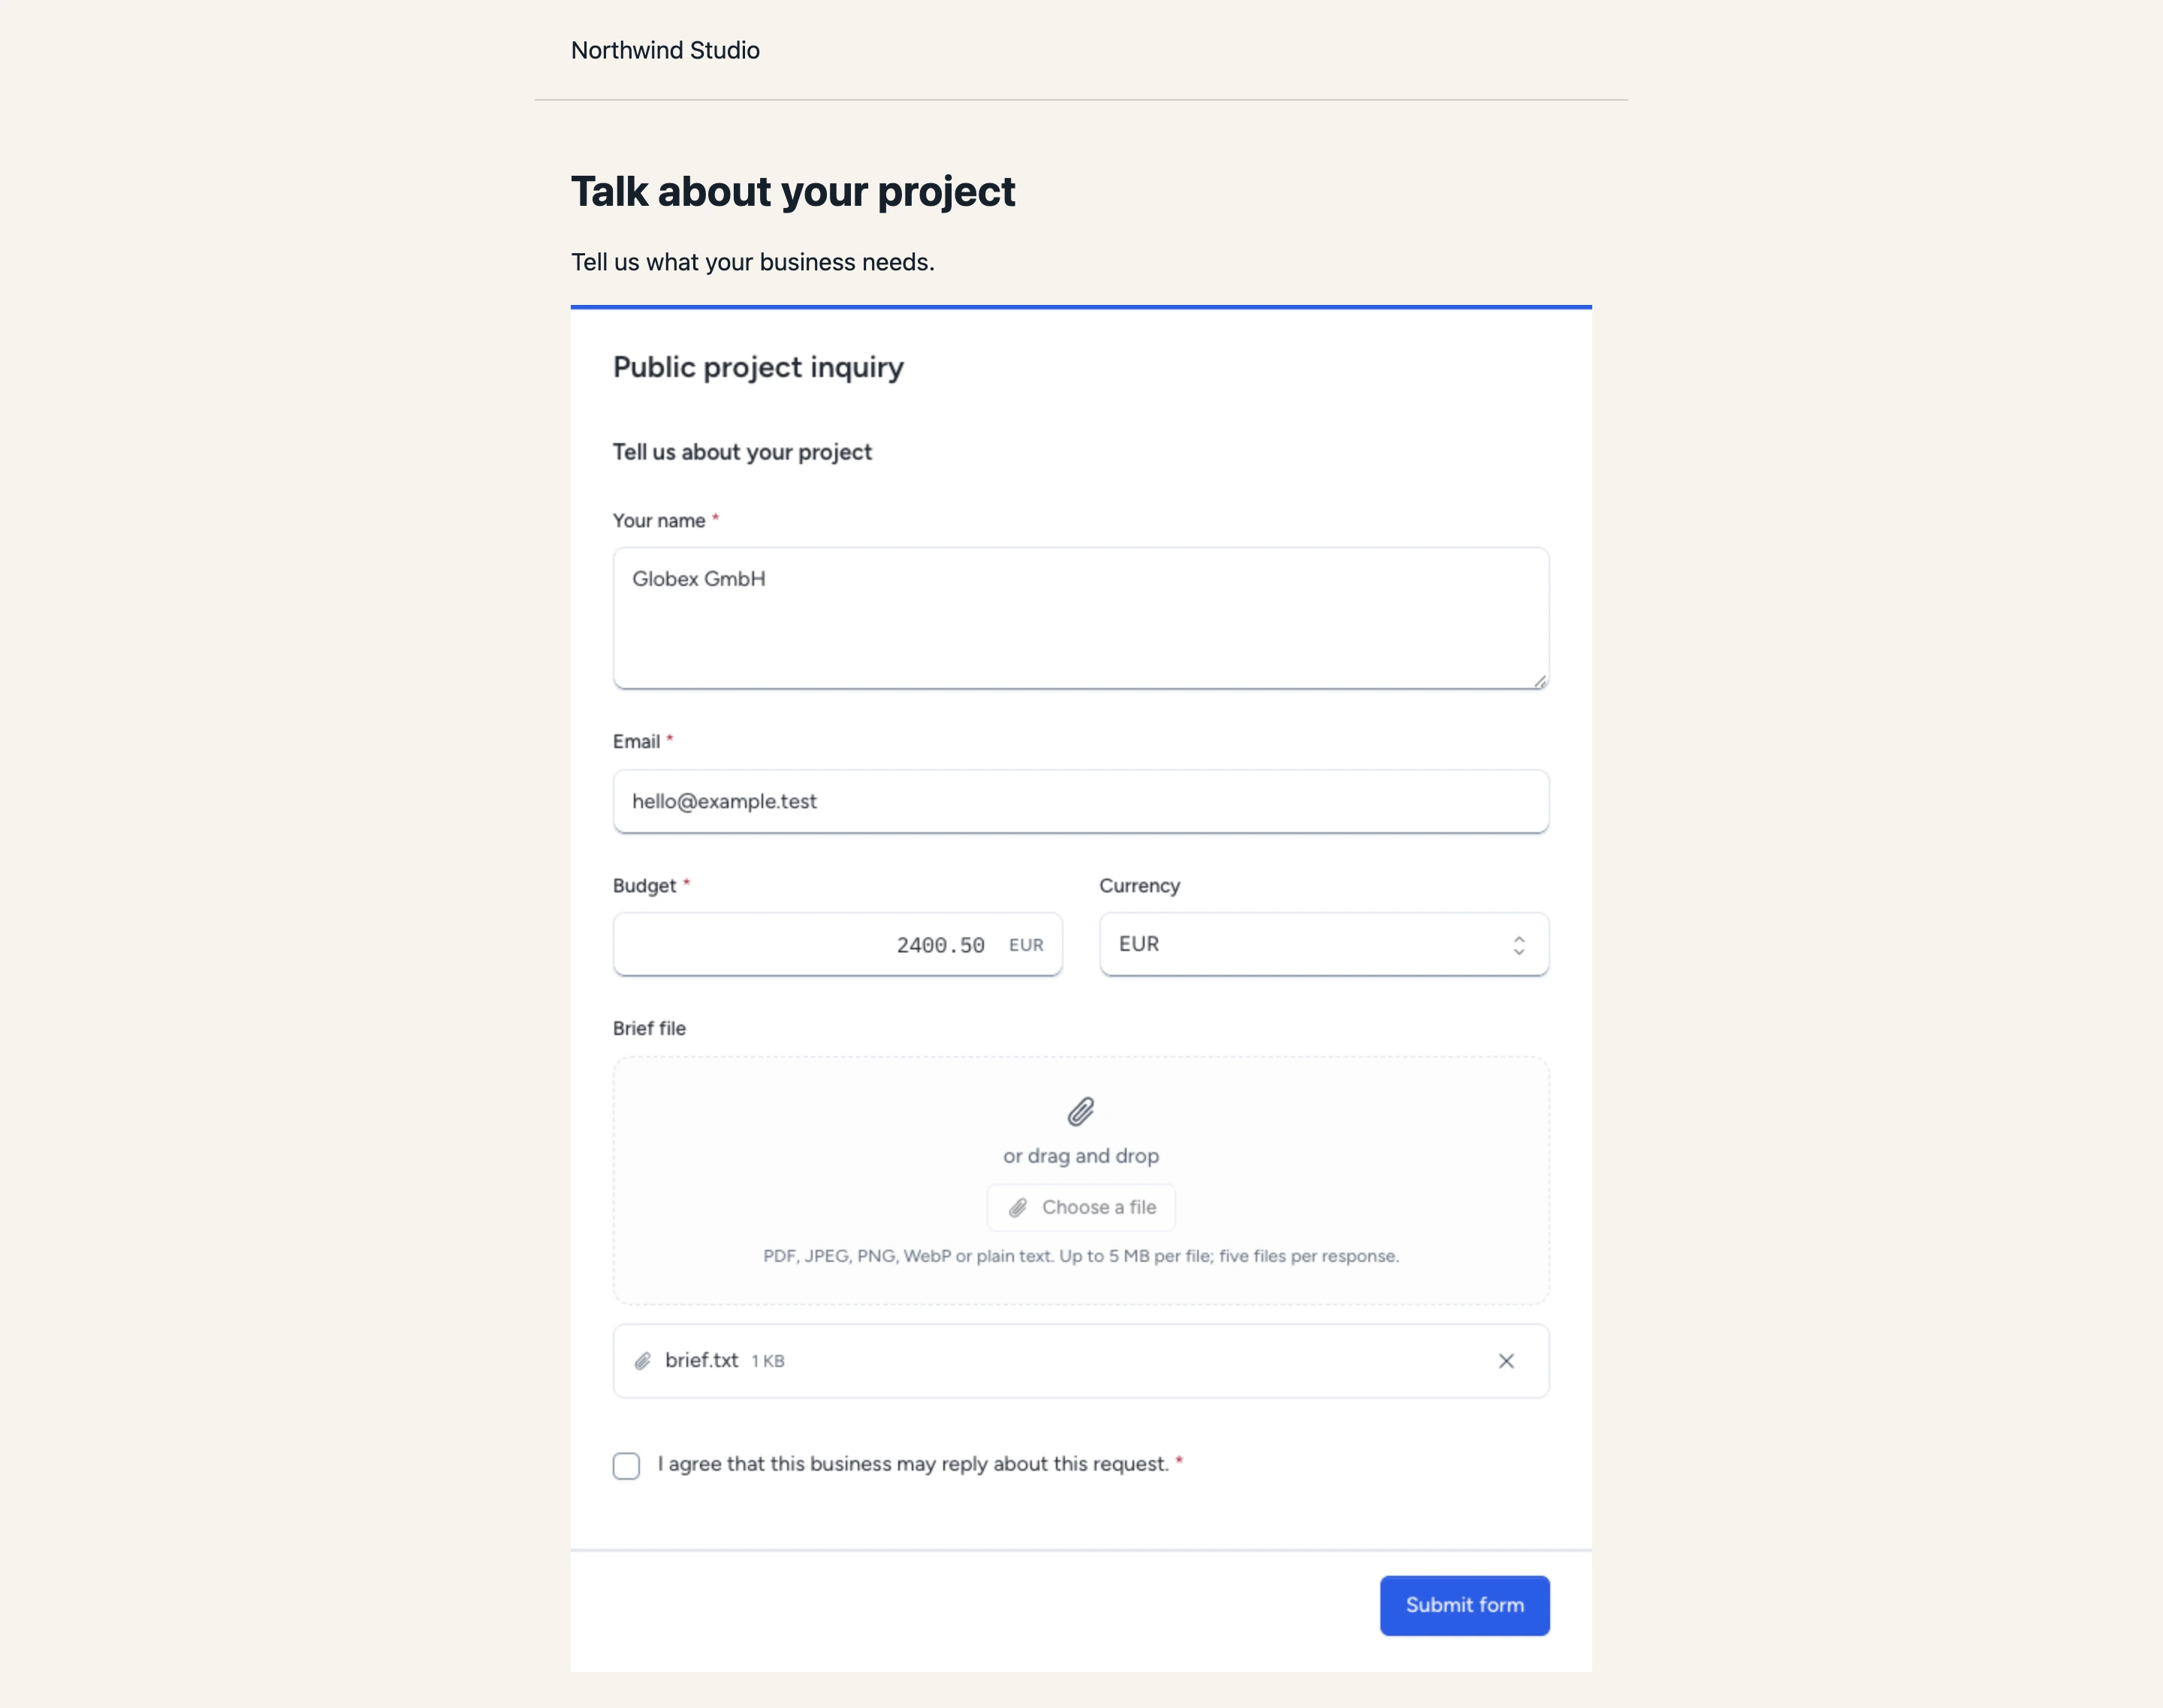
For example, a Globex GmbH inquiry keeps EUR 2,400.50. An Initech Pty brief can keep USD 980.50 or BHD 12.345.
The form action checks decimal precision. The widget makes no financial posting and changes no invoice total.
A refused request keeps your input and shows its cause. Correct the field and submit again. Files remain private under ordinary file-access rules.
The form creator receives an inbox update when they still have submission access and enable update notifications.
Response records appear in permitted search, record pickers and activity. Staff without Use internal forms receive no form records.
Loads counts successful form-context requests, including repeat visits and sign-in refreshes. Responses counts accepted submissions once. Neither figure counts unique visitors.
Use an internal form
- Click Sign in inside the form.
- Allow the pop-up window when your browser asks.
- Sign in to Made with Pepper in that window.
- Complete any required second-factor check.
- Check the website origin shown in the connection screen.
- Click Connect to this widget.
- Fill the form in the website.
The form always uses this separate sign-in window. It works with third-party cookies blocked and keeps its temporary identity in iframe memory.
A foreign website can learn only whether you are signed in. Its scripts cannot read form values, files or the sign-in code.
Use a different origin for the external website and installation. Same-origin pages share browser access and cannot provide this separation.
The connection lasts 15 minutes. If it expires, sign in again. Your entered work remains inside that open frame for the same person.
Connecting as a different person clears that work. Reloading or clicking Sign out also clears it. Sign out revokes the temporary connection.
Ordinary account suspension, role removal and sign-in revocation stop access. A cookie from another tab never signs this form in.
Close or change a widget
Click Close widget to stop it. Alternatively, clear Enabled and click Save changes.
Saving any widget edit closes publication. Check the preview, then publish it again. Saving a source form edit also invalidates its widgets.
After a source edit, publish the public form, save the widget against that form version and publish the widget again.
Closed, disabled or stale widgets render no form. Their endpoints refuse requests. A frame already open removes itself after its next refused request.
Closing preserves responses, consent and uploaded files. Rollback of widget tables refuses removal; use your ordinary backup and restore procedure.
Handle a refusal
| Symptom | Cause and next step |
|---|---|
| Nothing appears | Check JavaScript, exact origin, HTTPS, source publication, Enabled and widget publication |
| The browser blocks the frame | Check website CSP and installation proxy frame headers |
| The editor strips the script | Use its permitted code or theme area |
| The form says too many requests | Wait before retrying; writes allow 10 per minute and 100 per hour per IP |
| The connection window does not open | Allow pop-ups, then click Sign in again |
| The connection expires | Sign in again in the open frame; use the same person to retain work |
| The form reports changed data | Copy your inputs, reload the current form and review them before submitting |
Page, context and browser preflight requests allow 60 requests per minute per IP. The limits apply across widget keys.
A submission challenge becomes valid after 2 seconds and expires after 2 hours. After expiry, keep your inputs before reloading.
Replaying the same valid request creates no second response, file or consent. The widget shows success only after the server accepts it.
Try the sample website
- Open Widgets > Sample website in the demo.
- Click its configuration link.
- Add the sample page's installation origin under Allowed websites.
- Check Enabled.
- Click Save changes.
- Publish the source inquiry and widget.
- Return to Sample website.
- Submit a sample response.
Fresh and disposable demo installations include a closed sample widget. The sample page uses the real loader and form action.
Existing installations receive no automatic sample records. Bookings, payment buttons and customer portals are not included.
Agent connections can read widget configuration or prepare editable changes. They cannot enable or publish a widget.
Need help with the product?
Contact support