
Browse the manual
Installation
Install Made with Pepper on your server using the web installer.
On this page
Before you start
Check that your server meets the Requirements.
A new installation needs an empty database: MySQL 8.4, or MariaDB 10.11, 11.4 or 11.8. The installer sets up a new application; it does not update an existing installation.
For an existing Made with Pepper installation, upload and install the update from the dashboard.
You need:
- PHP 8.4 or newer
- An empty MySQL 8.4 database, or an empty MariaDB 10.11, 11.4 or 11.8 database
- A domain or subdomain of its own, for example
invoices.example.com. Not a subfolder - Required PHP extensions
- HTTPS on a public server
- Writable application root,
storage/, andbootstrap/cache/
Upload files
Caution: install Made with Pepper on a domain or subdomain, never in a subfolder such as
example.com/invoices. In a subfolder, links, signed quote links, cookies and assets can break. If the domain already has a website, add a subdomain such asinvoices.example.comin your hosting control panel.
Extract the Made with Pepper release zip and upload the full application to your hosting account.
The release zip includes vendor/ and public/build/. Do not run composer install, npm install, or npm run build for a normal buyer installation.
For Apache hosting, upload the included .htaccess files. The root .htaccess lets shared hosting accounts serve Made with Pepper even when the host cannot point the document root directly at public/. For Nginx hosting, configure your site to route requests to public/index.php.
Made with Pepper runtime assets are local. The admin UI, PDFs, charts, icons, and fonts do not depend on CDNs.
Run the web installer
Visit your domain in a browser. Before Made with Pepper shows server details or accepts database credentials, it asks you to prove access to the hosting account.
- Open
storage/app/private/installation/setup-tokenthrough SSH or your hosting file manager. - Copy the token into Setup token.
- Click Continue to setup.
- Continue within 30 minutes.
Keep the token private. Do not send it to anyone or place it in a URL. A wrong token shows "The setup token is not valid." at the field.
The token file expires after 24 hours. If it expires, remove that file through your hosting account. Reload the installer to create a new token.
The token is stored with owner-only file permissions. Made with Pepper never displays it in the page source, a response, or a log. Public setup requires HTTPS. Loopback HTTP is available for local development.
Choose the installer's language at the bottom of the page. The installer shows its labels, its checks and its failure messages in that language. The zero rate and the reverse-charge rate get their names in that language. The product's own language is Application language in Settings > Localization.
After proof, the installer guides you through three steps. The step list is on the left; below 768 px, a meter at the top shows the step.
- Requirements: the installer checks PHP version, required extensions, writable directories, mod_rewrite, and cURL HTTPS support. View technical details lists each check. All required checks must pass before Configure Instance works.
- Configure: this screen collects your business name, timezone, database connection, owner account and email delivery details.
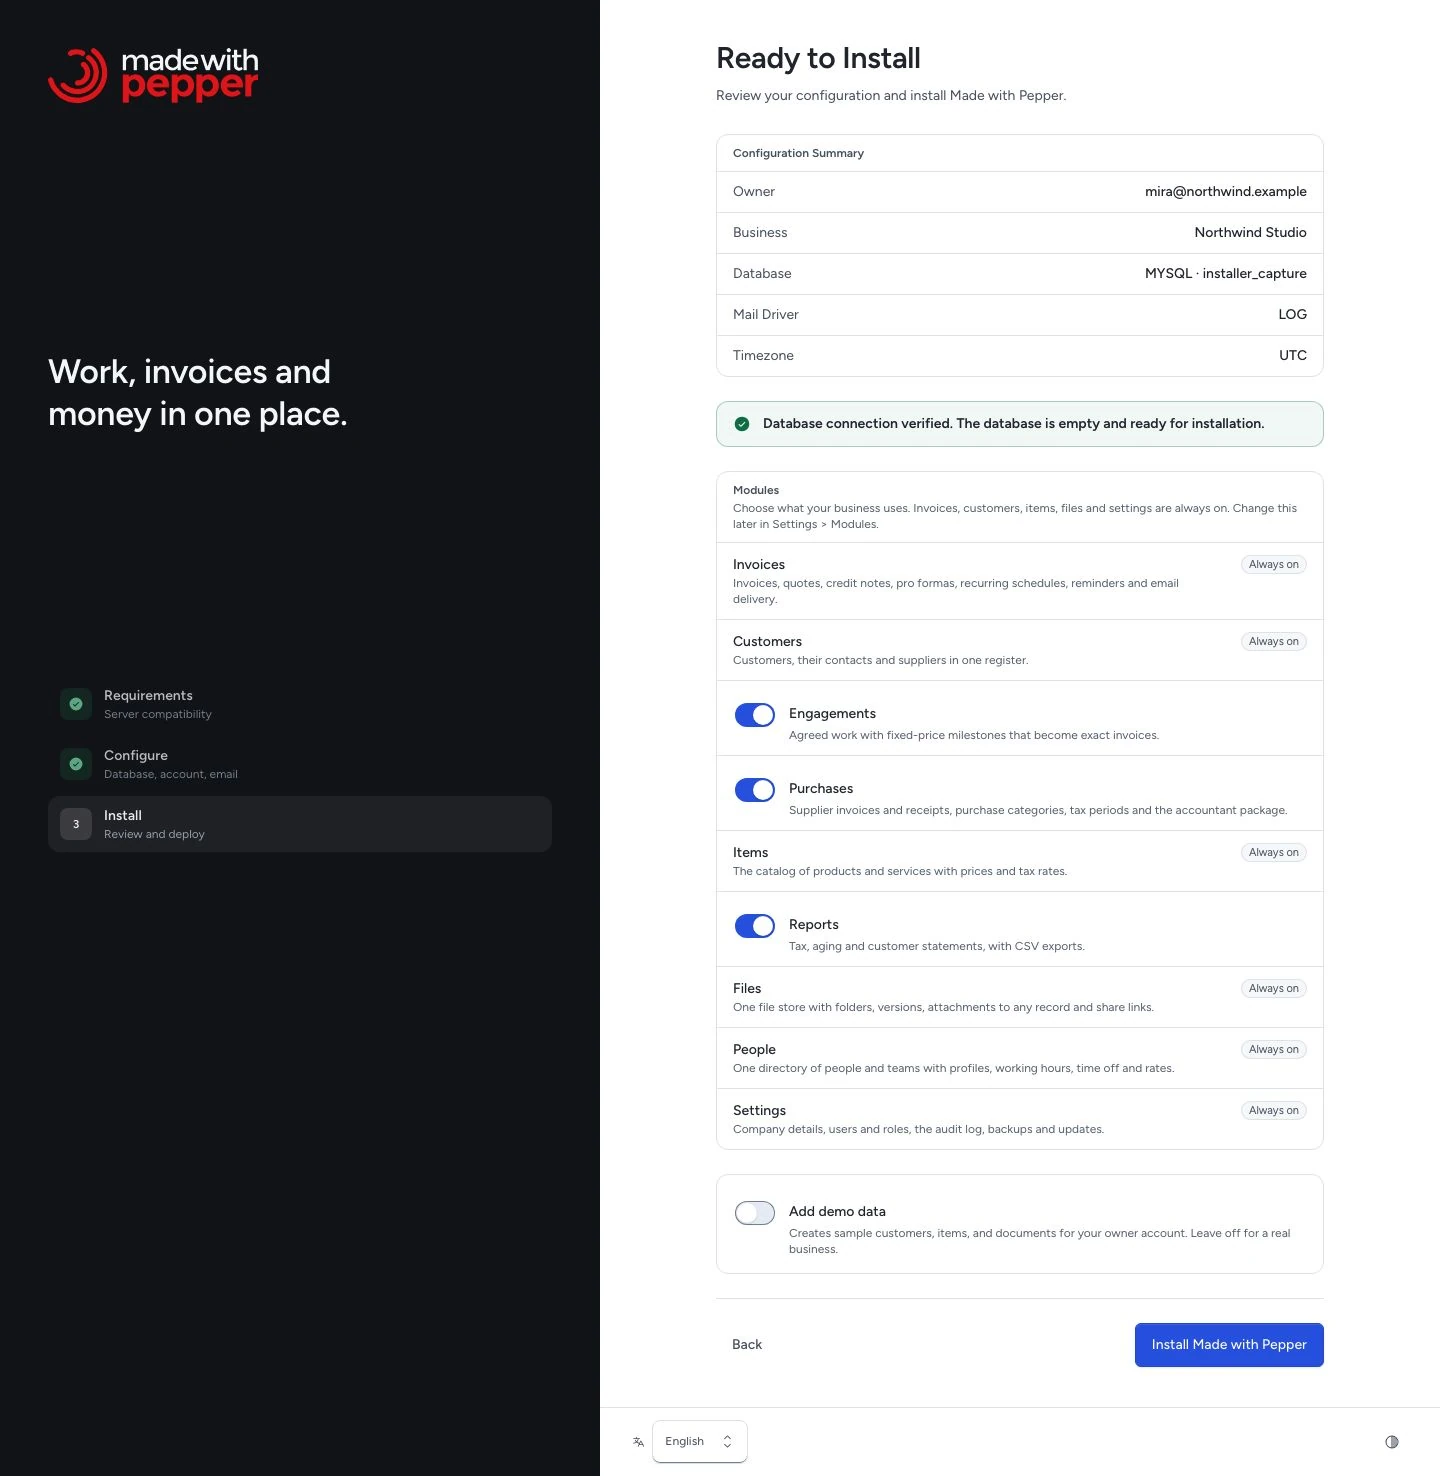
- Install: this screen shows the configuration summary and optional modules. Core modules stay on. Dependencies must be enabled. See Product areas and access.
On Configure:
- Enter your business name, timezone, database connection, owner account and email delivery details.
- Click Next Step.
The installer connects to the database and checks its server and empty state. It refuses unsupported servers before creating tables. A failed check shows a message above Next Step and changes nothing. See Database check messages.
On Install:
- Review the configuration summary.
- Choose the optional modules for this business.
To create sample customers, items and documents under your owner account, turn on Add demo data. The sample invoices cover the last six months, with paid, overdue and open invoices, so Home shows attention records and Reports has financial analysis. The samples also include engagements in every work state, one of them closed, and two recurring schedules, so every screen has records to explore. It creates no extra login accounts. Leave it off for a real business.
Click Install Made with Pepper. The installer runs migrations, creates the owner account and marks the application as installed.
The Time Zone list starts at UTC. Open it. Type part of a zone name, for example Auckland. Choose the zone. The installer uses that choice for the application, company settings, and your owner account’s initial display timezone.
The owner password needs at least 8 characters. If the confirmation does not match, the installer says so at the field. From Name and From Email copy the business name and the owner email until you change them.
Every fresh installation creates four email templates, whether or not you enable demo data. You can edit them in Settings > Email templates. Creating templates sends no email.
After installation, the installer shows Installation Complete and opens the sign-in page. Log in with the owner credentials you created, including when you added sample content. If the installation fails, Installation failed shows the reason. After you fix the cause, click Try again. To change the details, click Back.
Without sample content, the screens start empty. Each empty list, report and settings screen explains what it will hold, lists the first steps and offers the first action your role allows.
Sample content is available during fresh installation. Direct DemoSeeder calls and demo:reset refuse to run. To explore samples again, create a separate disposable installation. These changes do not remove accounts or records from an existing installation.
For your own read-only demo, complete that separate installation before setting DEMO_MODE=true and MAIL_MAILER=log. Set APP_URL to your demo's address. Keep its database separate from your business installation.
Use demo:rebuild --initialize --force in a deployment script to create a separate disposable MySQL 8.4 demo without the web installer. It creates four public demo logins and sample records in your configured database. It keeps your environment and key. Later deployments use demo:rebuild --force to preserve logins. Read Disposable demo rebuild for the destructive scope, deployment steps and login recovery.
Database target
Fresh installations use MySQL 8.4, or MariaDB 10.11, 11.4 or 11.8. Enter the host, port, empty database name, username, and password supplied by your hosting provider.
Database check messages
The message names the reason.
| Message | Cause | Fix |
|---|---|---|
| This database server is not supported: MariaDB 10.6.18. Use MySQL 8.4; MariaDB 10.11, 11.4, 11.8. | The server is a version that Made with Pepper does not accept | Ask your host for a supported version, or create the database on a supported server |
| This database engine is not supported: … | The server is not MySQL or MariaDB, or the database driver is not MySQL | Use MySQL or MariaDB |
| The database refused the user name or password | Wrong user name or password, or the user may not use this database | Check the credentials and the user's rights in your hosting panel |
| The database name does not exist on this server | The database was not created, or the name has a typo | Create the database first, or correct the name |
| The database server did not answer | Wrong host or port, or the server is down | Check the host and port with your host |
| This database server cannot create InnoDB tables | The InnoDB storage engine is not available on the server | Ask your host to enable InnoDB |
| The database is not empty | The database has tables | Create a new empty database |
The installer writes each refusal to storage/logs/laravel.log with the reason and the detected server version. It never writes the password, the user name or the host.
Made with Pepper will not empty a database from the installer. If the target contains tables that do not belong to the current setup attempt, the installer stops without changing them. Create a new empty database and try again. If you point the installer at the database of an earlier Made with Pepper installation, it stops before any migration. The message is "The database is not an empty or recognized setup target. Use a new empty database or contact support.", followed by a support reference. Nothing in that database changes.
Email configuration
The installer offers four email modes:
- SMTP: enter your SMTP server host, port, username, password, and encryption method. Works with any SMTP provider (Gmail, Outlook, Amazon SES, Mailgun, etc.).
- Resend: enter your Resend API key from resend.com. No SMTP server details needed. Resend delivers email through its API.
- Mailpit: uses a local Mailpit instance on
127.0.0.1:1025for development with Laravel Herd or Docker. - Log mode: Made with Pepper writes emails to the application log file without sending them. This is useful for testing or when email delivery is not yet configured. Documents you send in this mode stay Not emailed. You can switch to SMTP or Resend later by editing the
.envfile.
Installation logging
After a successful installation, Made with Pepper appends a log entry to storage/logs/laravel.log recording the database driver, email mode, and a hashed owner email identifier. It preserves earlier log entries. The new entry contains no passwords, API keys, SMTP credentials, or raw email addresses.
Made with Pepper also writes a system.installed audit log entry to the audit_logs database table. This is the first entry in the structured audit trail that Made with Pepper maintains for security and compliance events.
Failure recovery
If installation fails before configuration is published, Made with Pepper keeps a private attempt record. Fix the reported connection, migration, or permission problem, then retry with the same database details and owner email. The retry keeps the application key and any owner password already written by that attempt. Seeders add missing defaults without replacing customized template text.
When installation fails during database setup, the installer writes the cause to storage/logs/laravel.log with the support reference. The entry contains the database error code and message. It does not contain passwords or the details you entered.
If the message says that installation stopped while it created the database tables, a retry cannot continue from that point. MySQL and MariaDB keep the tables that were created before the failure. Remove partial tables only from the new, empty database created for that failed attempt. Never remove existing business data. Retry with the same details. If the target is uncertain, create another empty database or contact support.
In all other cases, do not remove partial tables or switch database targets during a retry. If Made with Pepper cannot match the private attempt record to its database marker, it refuses further writes and shows a support reference. Use a new empty database or contact support with that reference.
If the browser loses the final response, visit the site again. A completed setup stays closed even when a server still has stale configuration in memory. Sign in with the owner account you created. Do not run the installer again.
Data recovery
Recovery uses a separate directory and an empty database on the same engine as the backup. A MySQL backup needs MySQL 8.4. A MariaDB backup needs MariaDB 10.11, 11.4 or 11.8. It requires the original application key, a trusted application package and an authenticated backup.
Do not run the web installer on that destination. It would create tables and make the destination ineligible for recovery.
Follow Restoring from a backup. The shell command restores the database and media, verifies issued originals, and leaves the replacement in maintenance mode.
Keep the source intact. Account for records created after the snapshot before switching traffic. Restore is not available in the browser. Install new releases from Updates.
Troubleshooting
See Common issues for blank pages, permission errors, missing extensions, database problems, and email delivery issues.
Installation steps
- Prove hosting-account access with Setup token.
- On Requirements, check that all required server checks pass.
- Under Configure, enter the empty database connection and other setup details.
- Review the configuration and optional modules on Install.
- Click Install Made with Pepper to install the app and create the owner account.
- After successful installation, sign in with the owner credentials you created.
Need help with the product?
Contact support