
Browse the manual
Create forms and custom fields
Build internal or public forms, keep responses and consent, and add custom fields to your records.
On this page
For: owners who collect information and staff who use business records.
Where: Work > Forms. On a phone, open More, then Forms.
Before you start: sign in with the permissions below. Create a record before adding its custom values.
A form keeps each submission with the fields and labels used at that time. Later edits do not change that submission.
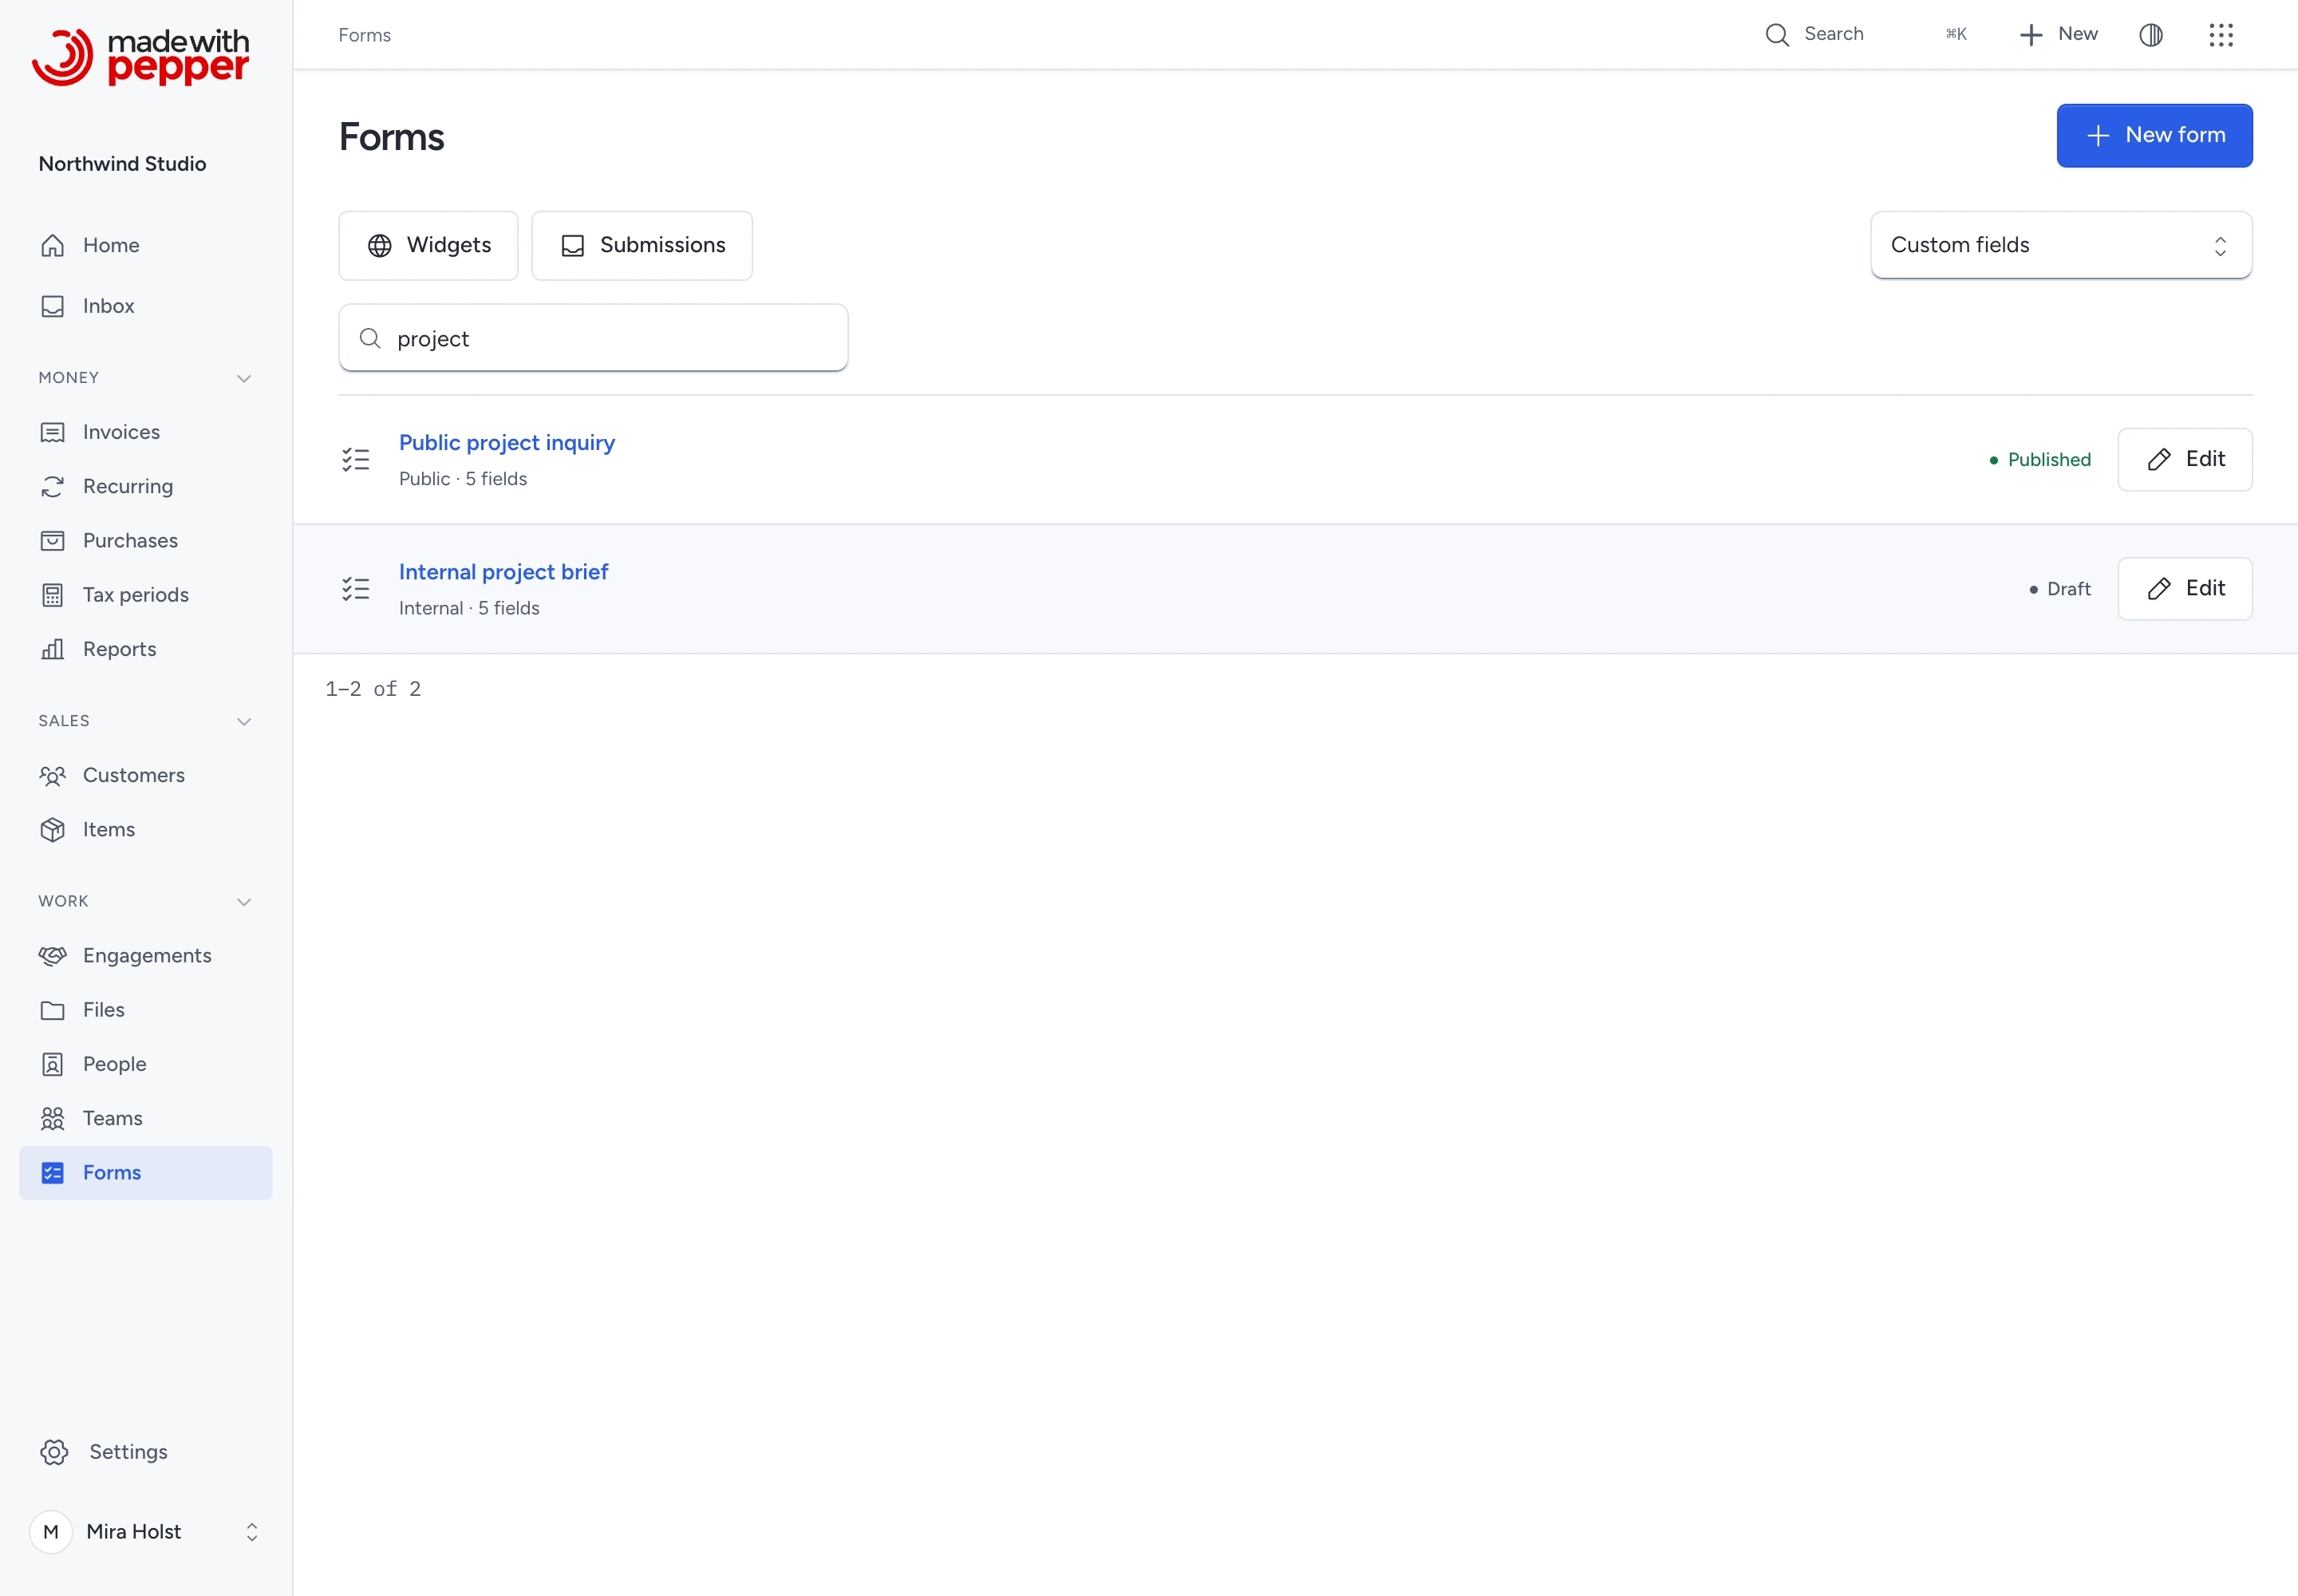
Find a form
Use the search field to find a saved form by name. If no form matches, click Clear filters to return to the register. The first-use page offers New form when you can create forms.
Check your access
| Task | Permission and default roles |
|---|---|
| Create, edit, publish or close a form; define or retire custom fields | Manage forms and custom definitions; Owner and Admin |
| Read an internal form and submit a response | Use internal forms; all 4 built-in roles |
| Create or update a customer through a form | Manage customers and Use internal forms; Owner, Admin and Employee |
| Read custom values | Access to that record |
| Change custom values | The record area's ordinary manage permission; people also use their person-edit rules |
| Change custom values on a document | A draft, document access and draft-edit permission |
| Add an internal file | Manage files and access to the target record |
Staff without form-management permission see their own response records and submissions. Customer submissions also require current customer access.
Guests cannot use internal forms or change custom values. A public form needs no account.
Build an internal form
- Open Forms.
- Click New form.
- Enter the Name.
- Set Who can fill this form to Internal.
- Select the Target record.
- Use Response record to keep a new response in the business records.
- Use Customer to create a customer or update one selected by the submitter.
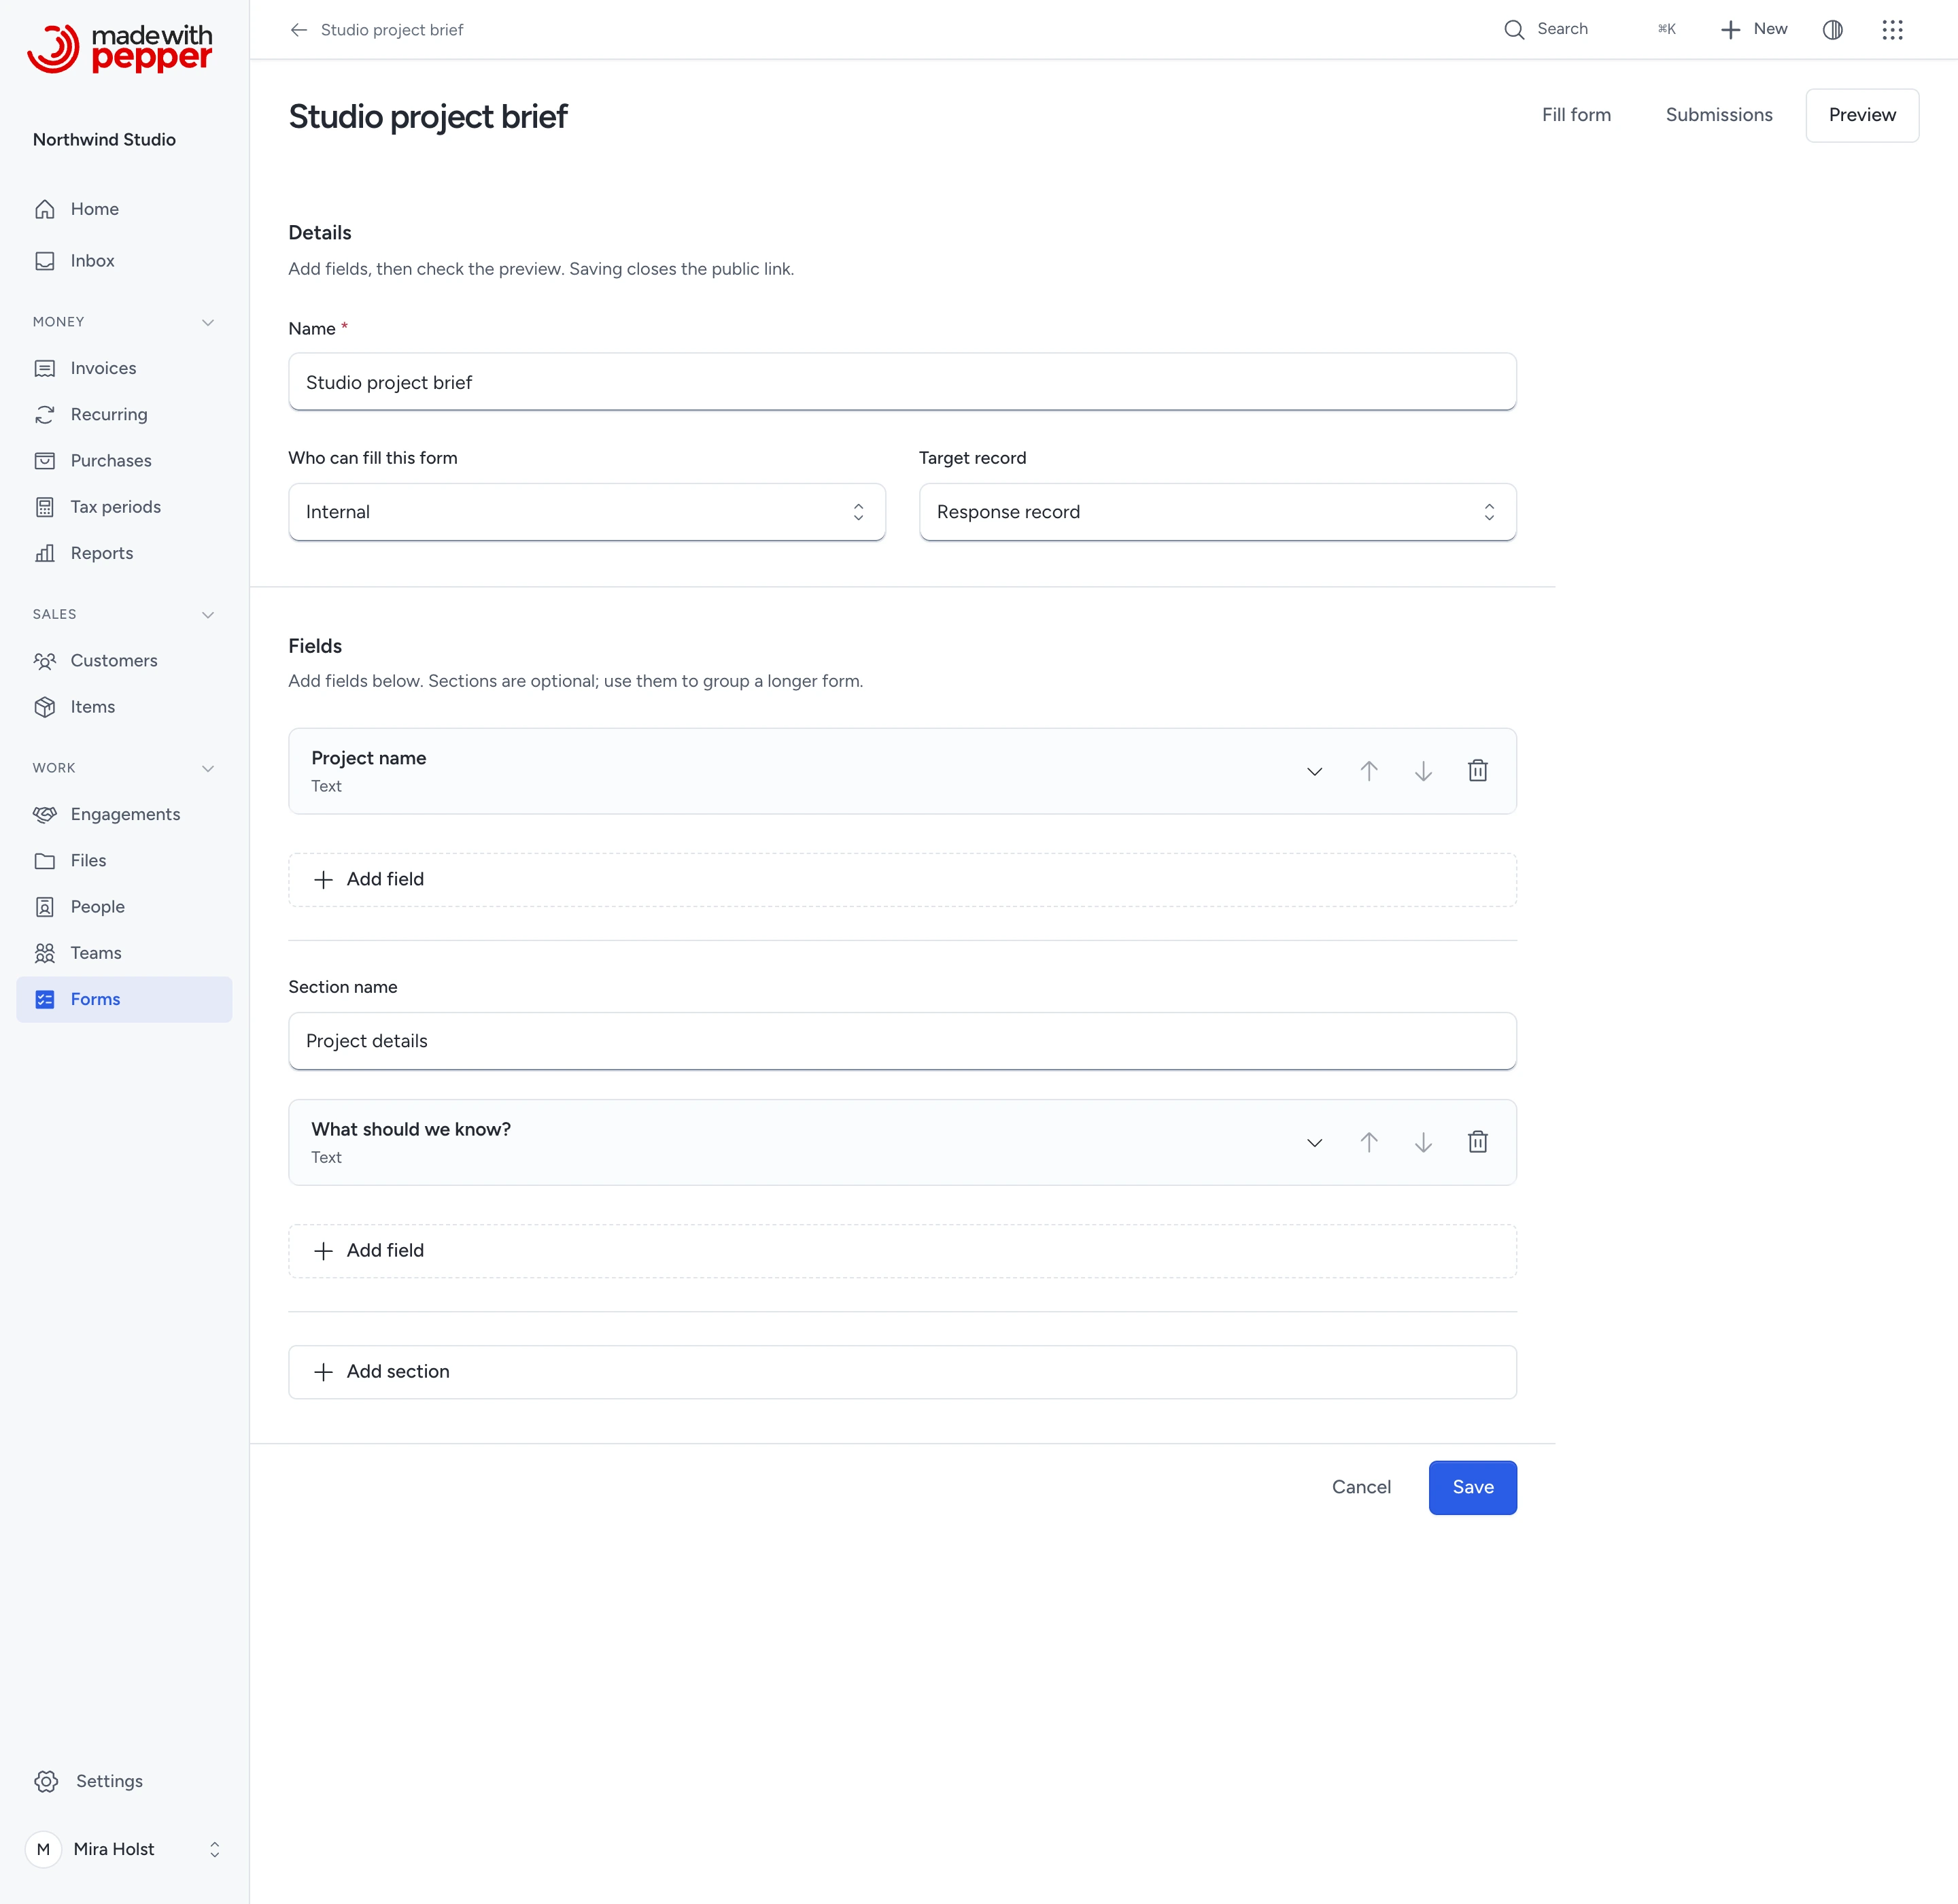
- Under Fields, click Add field.
- Enter its Field label.
- Select its Type.
- Check Required when the submitter must provide a value.
- Open More field options to add Help text when needed.
- Repeat for the other fields.
- To divide a long form, click Add section below the fields.
- Name the new section.
- Repeat steps 9 to 12 for its first field.
- For Customer, map the name field.
- Click Preview to try the form.
- Click Edit to return to the builder.
- Click Save.
Add field selects the new label for typing. Add section selects the new section name and opens its first field for editing. For Customer, map email, phone and contact person when needed.
If Save refuses a value, keep your draft and select its link in the error summary. Made with Pepper opens the field if it is closed and moves focus to the control. Read the error beside it, correct the value, then save again. A general schema error points to the fields as a group.
Made with Pepper derives new field keys from their labels. You do not enter a key.
Keys start with a lowercase letter and use lowercase letters, digits and underscores. Each key has at most 40 characters.
Duplicate labels receive distinct keys. Saved keys stay fixed when you change a label. Choice values also stay fixed when you change their labels.
Sections are optional. A new form starts without a section name or heading. Existing forms keep their named sections.
A form has at most 50 fields and 20 named sections. Labels and section names have at most 120 characters. Help text has at most 500.
Fields without a section appear first in Preview. Each named section then contains its own fields. Its full-width Add field button adds a field to that section. Add section follows the existing sections.
Use the Up and Down buttons to reorder fields within a section. When a named section exists, use Section to move a field. Choose No section to place it in the plain list.
Open a saved field's heading to edit it. Its arrow shows whether it is open. The Up, Down and bin buttons sit in the same header. Closing a field keeps your unsaved input. Remove only empty sections. To remove a section that contains fields, first move its fields to No section. Their saved identities stay fixed.
Choose a field type
| Type | Input and limits |
|---|---|
| Text | Plain text, up to 4,000 characters |
| Number | Exact decimal text; up to 24 integer digits and 6 decimals |
| Money | Exact amount and a configured currency; up to 18 minor-unit digits |
| Date | A real date in years 1000–9999 |
| Time of day | Hours and minutes, from 00:00 to 23:59 |
| Single choice | One of up to 50 options |
| Multiple choices | Several of up to 50 options |
| Checkbox | Checked or unchecked |
| File | One file in this field; file rules below |
| An email address, up to 254 characters | |
| Phone | Up to 40 characters: digits, spaces, +, (), periods and hyphens |
| Address | Street, city, region, postal code and country; up to 250 characters in each part |
| Consent statement | A separate choice; required consent must be checked |
| Linked record | A record the submitter can open; internal forms only |
Enter money in the displayed number format. EUR and USD use 2 decimals, JPY uses 0, and BHD uses 3.
For example, EUR 1,250.75, USD 980.50 and BHD 12.345 keep their exact amounts. Different currencies stay separate.
Made with Pepper refuses extra decimals, rounded numbers, exponents and amounts outside the limits. Custom money does not change invoice totals.
Show a field only when needed
- Add a Single choice or Checkbox field before the dependent field.
- On the dependent field, open More field options.
- Select that earlier field under Show when.
- Select the value under Equals.
- Check the condition in Preview.
- Click Save.
Hidden fields make no write and are not required. Changing the controlling choice keeps your draft input until you leave the form.
To remove a condition, open More field options and set Show when to Always visible. You can do this after removing its controlling field.
A condition cannot refer to a later field or section. An untouched checkbox is unchecked. Made with Pepper refuses an order that breaks this rule.
Open or close a public form
Public forms create response records only. They cannot update a record, select a customer or choose an internal record or existing file.
- Create a form with Public under Who can fill this form.
- Use Response record as its target.
- Add a Consent statement when you need a recorded choice.
- Write the exact statement in its label.
- Click Save.
- Click Publish form.
- Copy the public address shown in the builder.
- Open that address in a separate browser to test it.
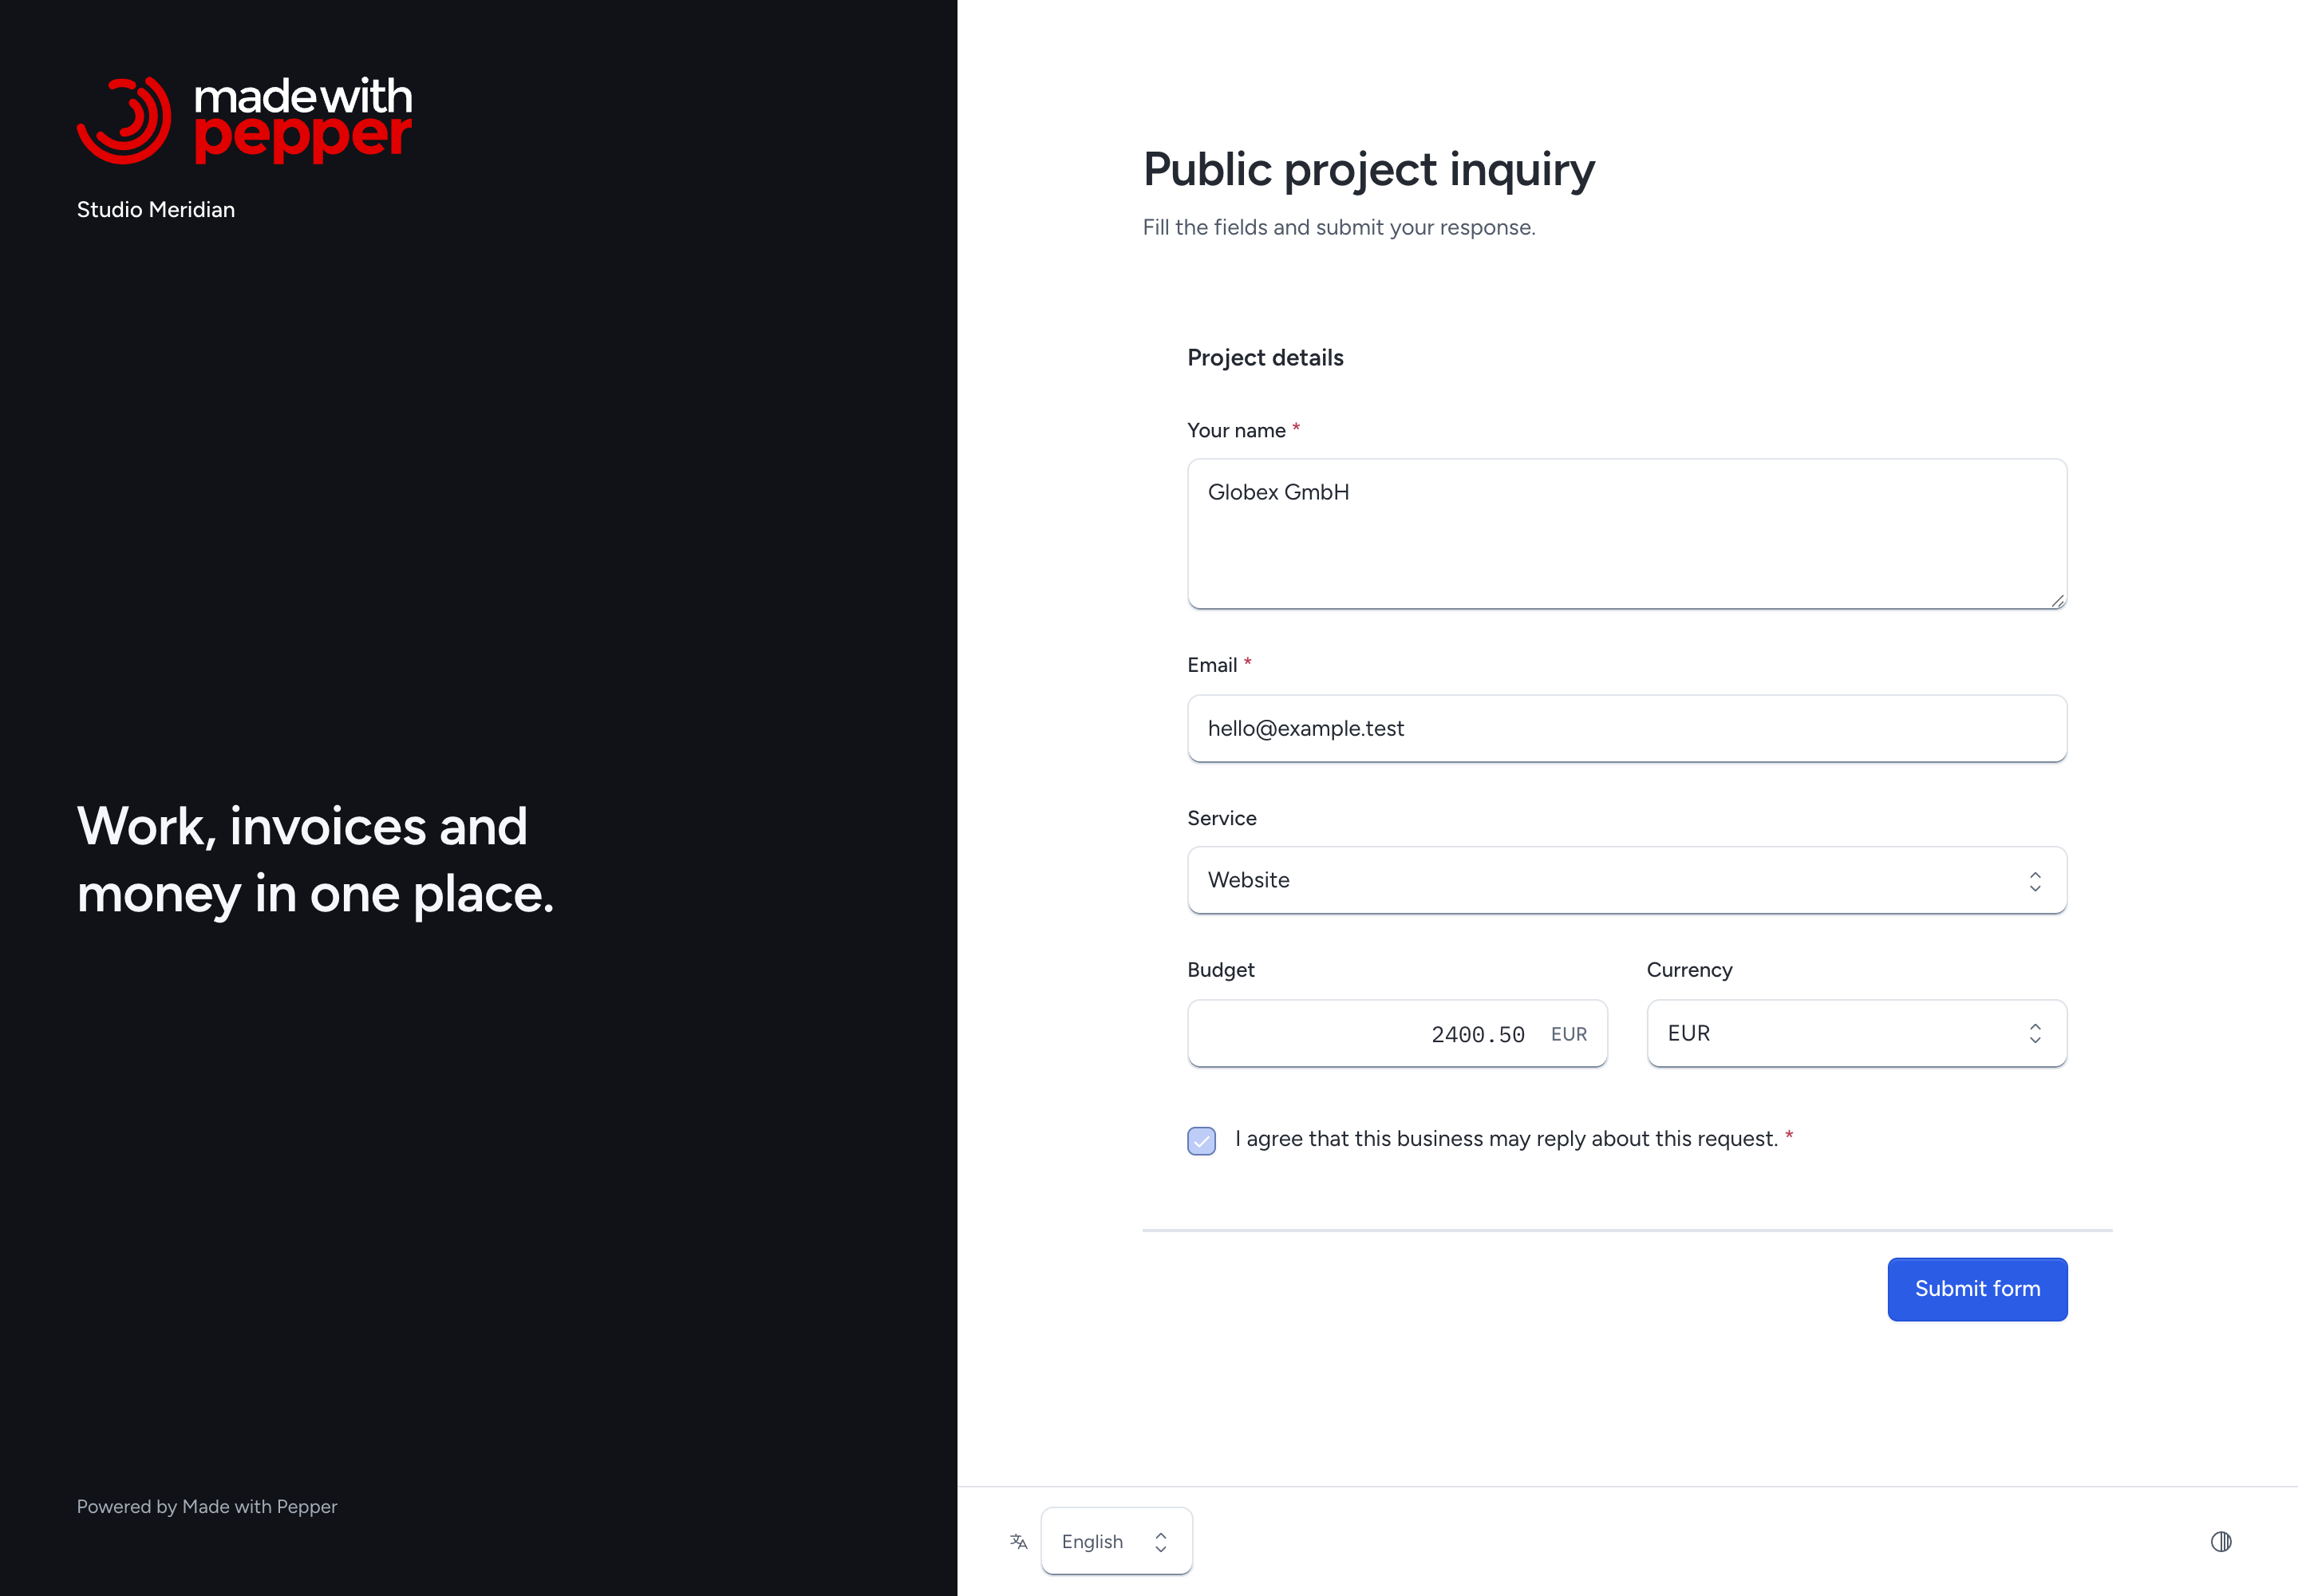
Click Close in the builder to stop submissions. The public address then shows a missing-page response.
Saving an edit closes the address and advances the form version. Check the changed preview, then click Publish form again.
Each public visitor gets a browser challenge. It becomes valid after 2 seconds and expires after 2 hours.
Keep the same browser session. After expiry, copy your input and open the form again.
Public submissions allow 10 requests per minute and 100 per hour from one IP address. The page allows 60 visits per minute.
A refused request shows the reason and keeps the entered fields. A successful submission shows only a receipt.
Replaying the same valid submission creates no duplicate response, file or consent. The public visitor receives no internal record link or submitted-data response.
Widgets embed response forms on an allowed website. Bookings and customer portals are not included.
Submit and read a response
- Open an internal form from Forms.
- Fill its active fields.
- For a customer form, select an existing customer only when you want to update it.
- Leave that selection empty to create a customer.
- Click Submit form.
- Read the kept submission.
- Open its linked target record when needed.
Use Submissions in Forms to open the submission view. Filter by Form to find one form's submissions.
An internal response record has an Edit action. Each saved update adds a submission and keeps the earlier values.
Customer updates use the ordinary customer action and the submitter's current permission. They never alter an earlier submission.
The form creator receives an inbox update when they still have submission access and enable update notifications.
A consent row keeps the exact statement, accepted state, form version, time and submitter kind. Closing or editing the form keeps this evidence.
Form text is plain text. Entered HTML stays text in the builder, preview and kept response.
Add private files
A form accepts PDF, JPEG, PNG, WebP and plain-text files. Each file is at most 5 MB. One submission accepts at most 5 files.
The content must match an allowed type. The installation's storage quota and PHP upload limits also apply.
Click Choose a file, or drop a file into its field. A file stays private and links to the target record.
When you reopen an internal response or custom-field editor, keep the selected file to save changes to other fields.
Click Remove file to clear the field value. The stored file and earlier submissions stay.
A staff member needs file access and access to a linked record before reading it. Public uploads do not grant public download access.
Define custom fields
- Open Forms.
- Select a record area under Custom fields.
- Click Add field.
- Enter the Field label. Made with Pepper creates the key.
- Select the type and its options.
- Check Required when needed. Open More field options for help text and conditions.
- Click Save.
The empty page explains custom fields and offers Add field. Saved fields show their label and type. Required fields have a Required marker.
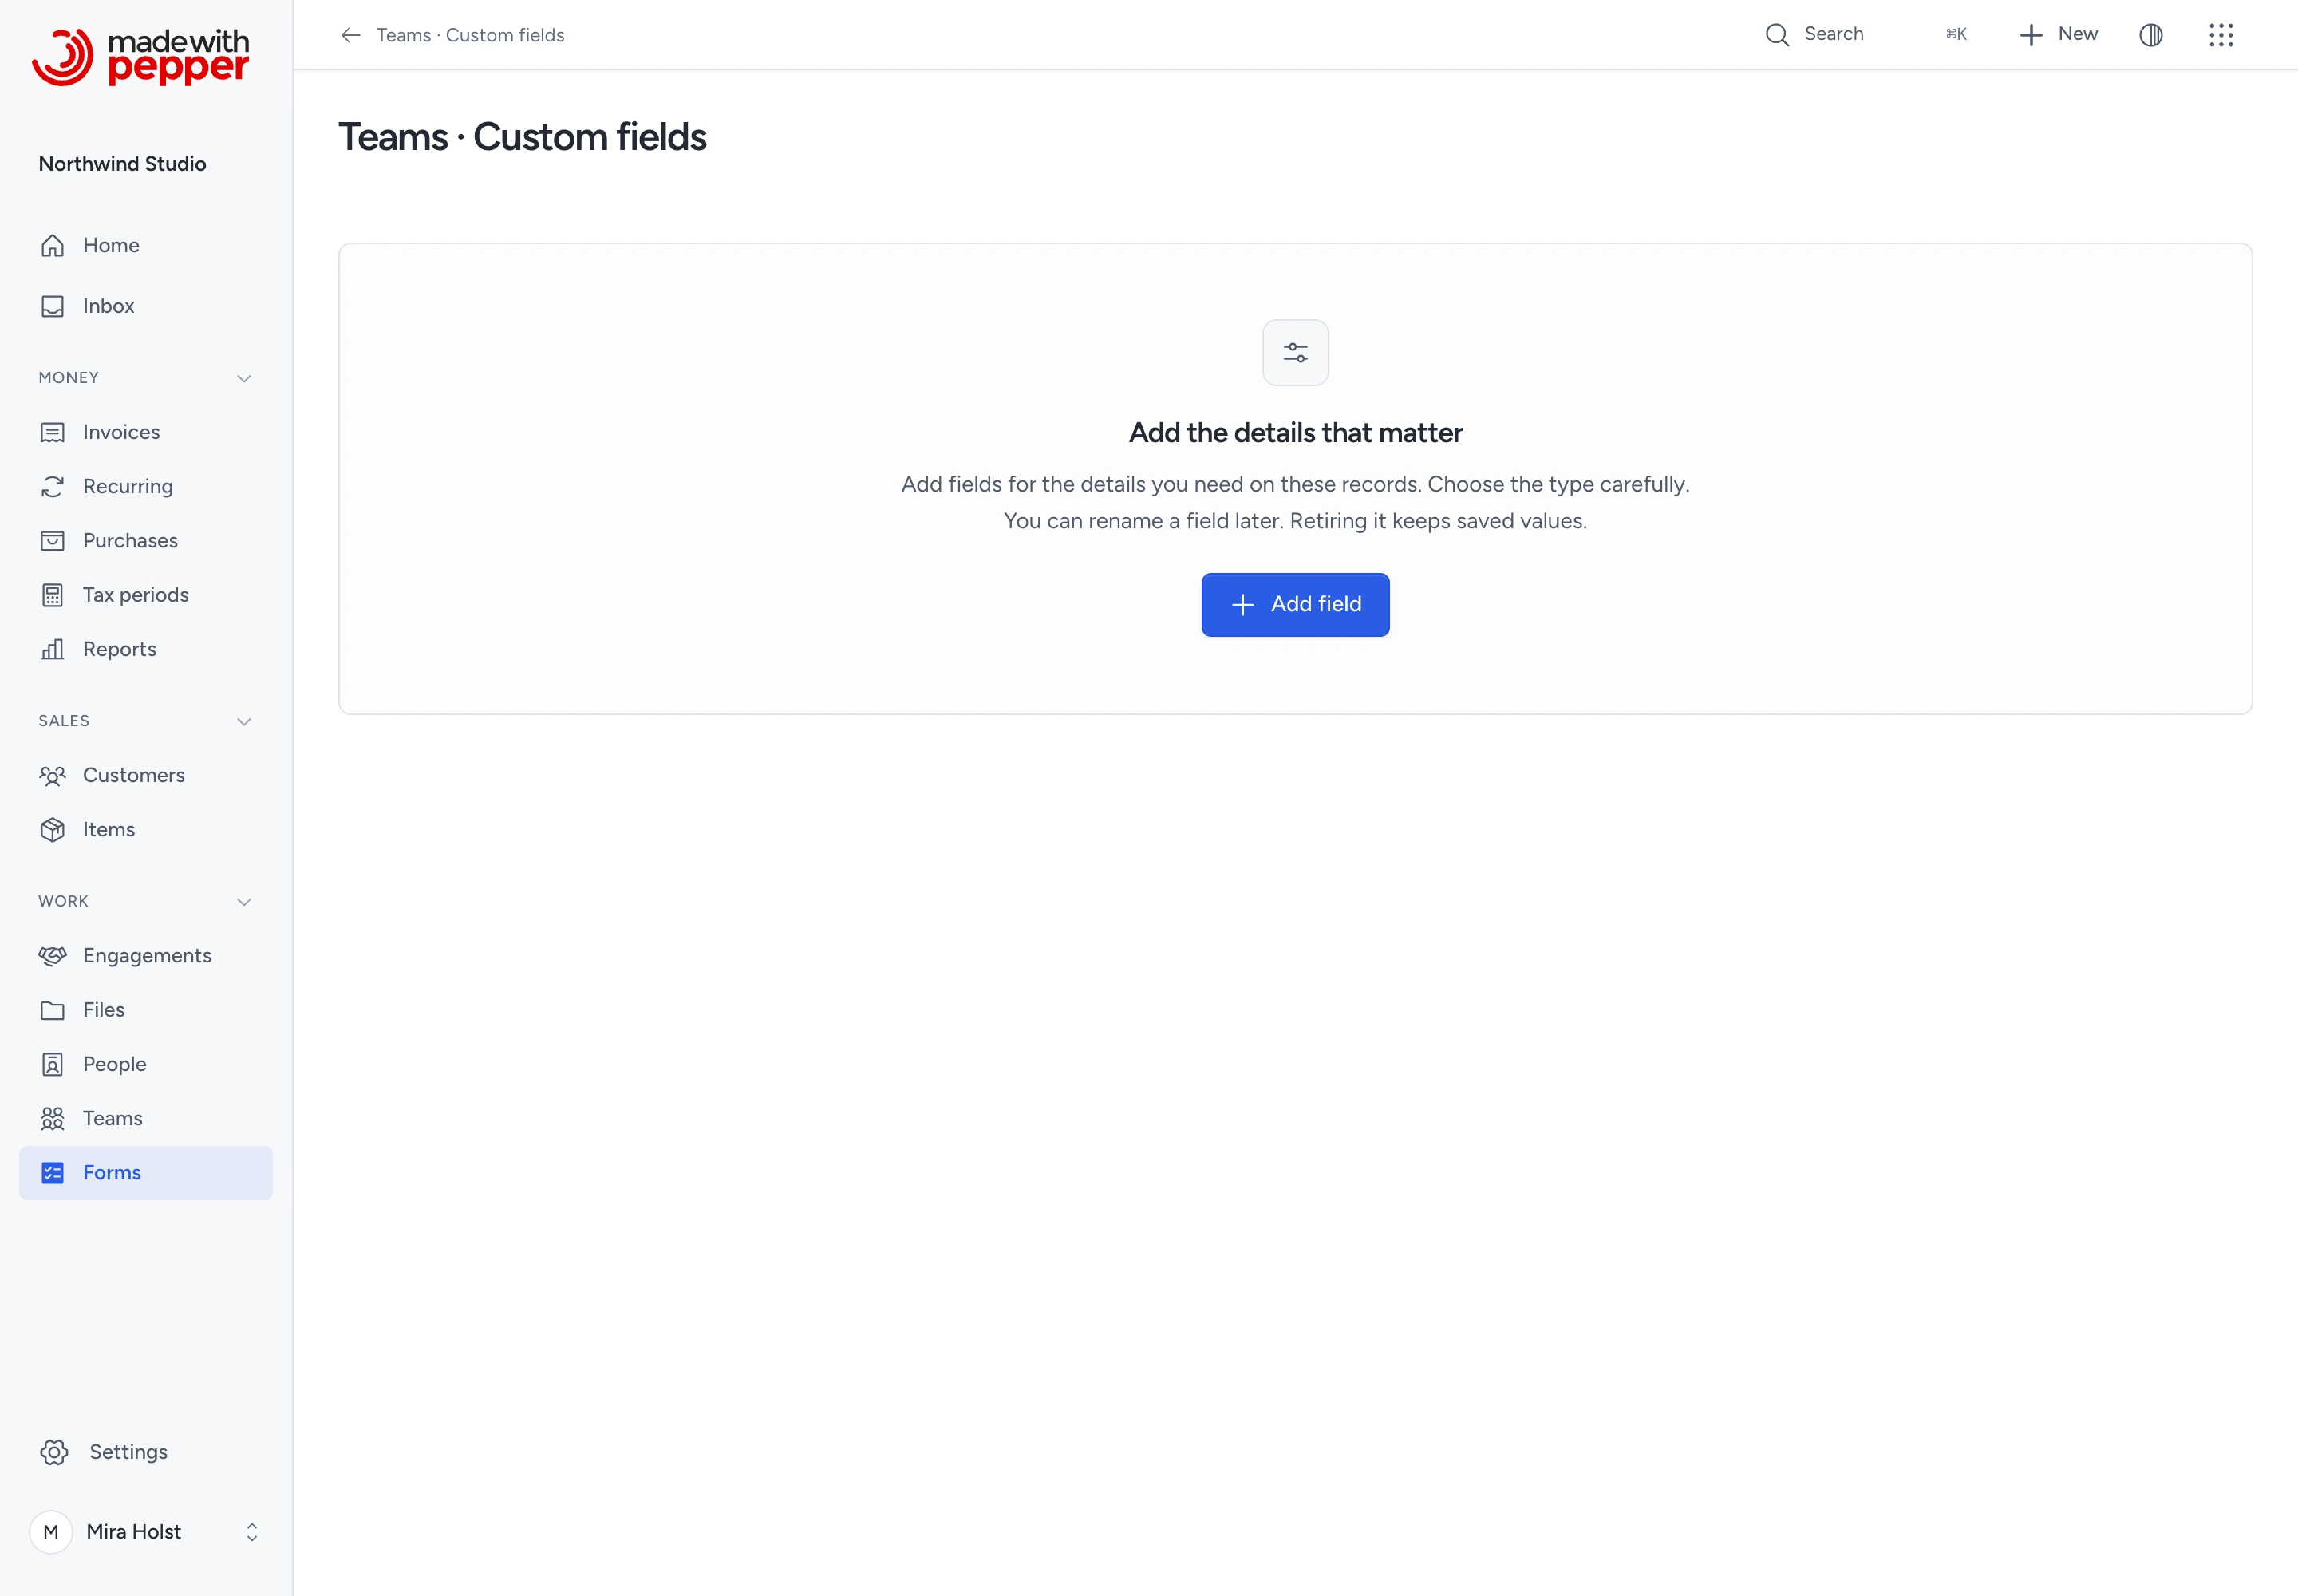
Each registered record type can have up to 50 custom fields. This includes customers, documents, items, purchases, projects, files, people, teams and form records.
A saved custom key and type cannot change. Edit its label, help text, options or condition through Edit.
If a custom-field save refuses a value, select its error-summary link to reach the control. Correct it and save again; your other inputs stay in the editor.
Click Retire field to stop new edits and hide it from default views. Confirm the retirement.
Retirement keeps the definition and stored values. A field used by another field's condition cannot retire until you change that condition.
Change custom values
- Create the ordinary record first.
- Open its detail or edit page.
- Find Custom fields below the ordinary record content.
- Click Edit custom fields.
- Enter the values.
- Click Save.
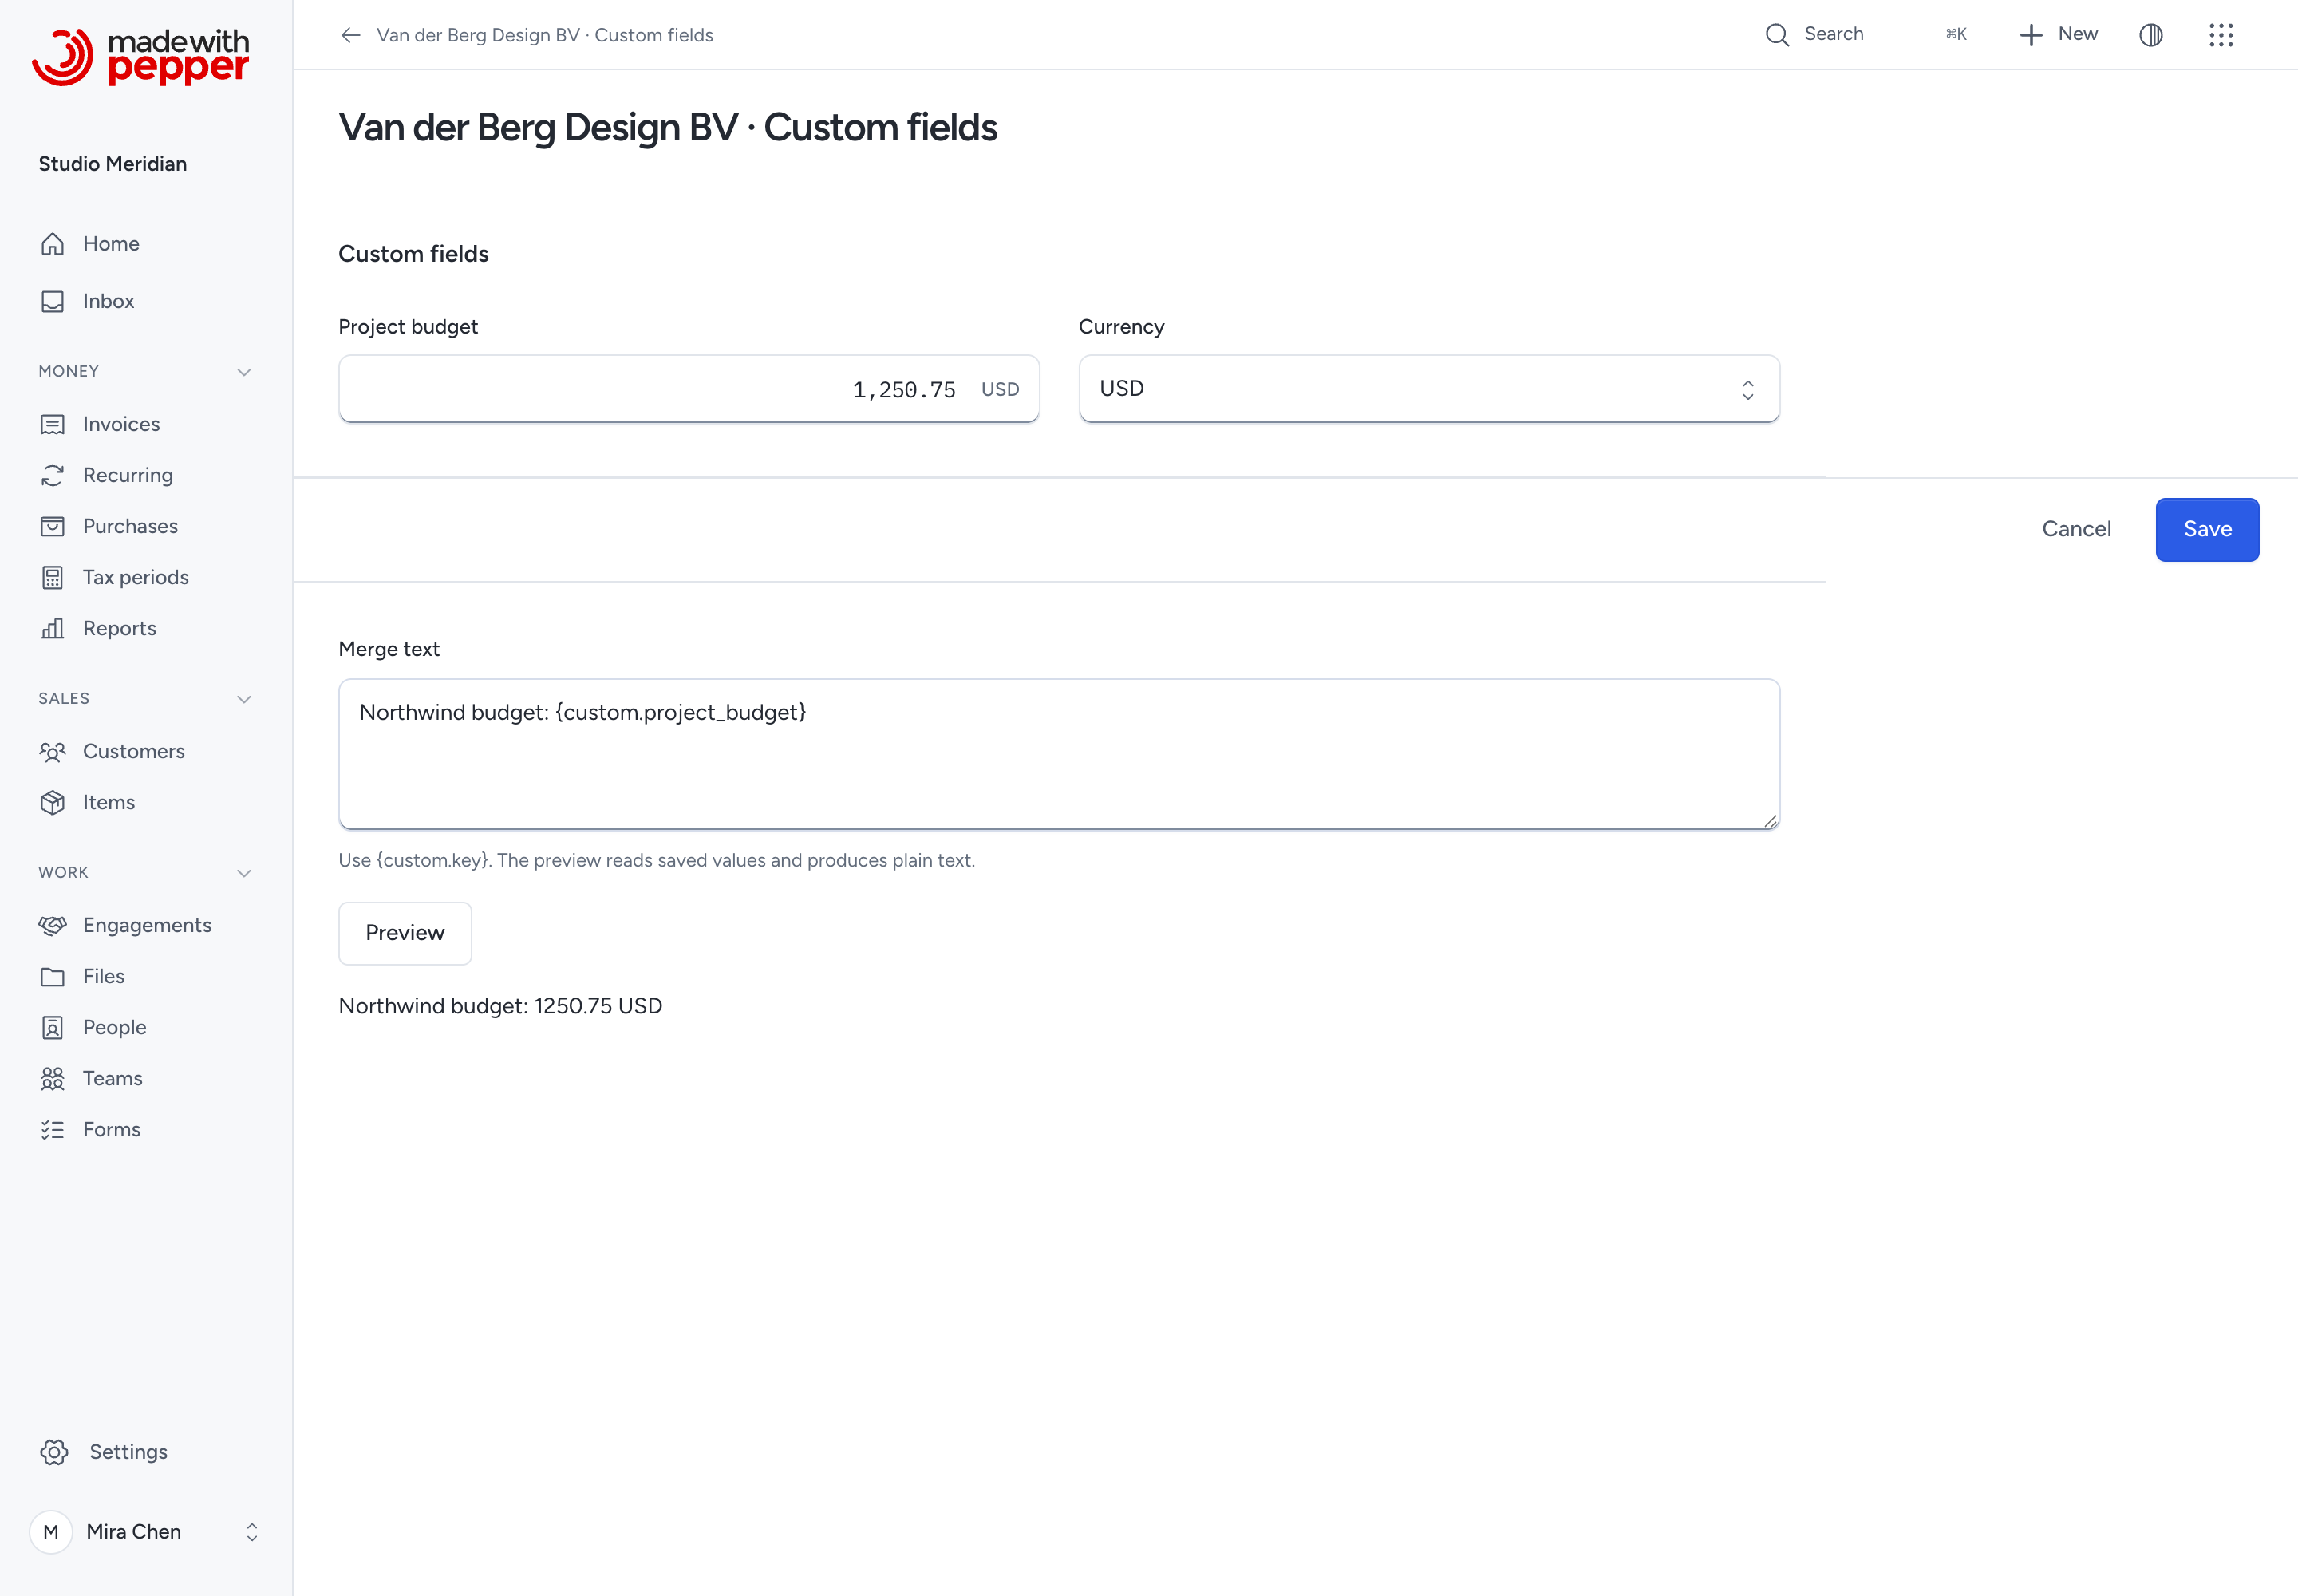
The shared editor uses the same checks as the record area. Issued document values cannot change.
A record you can read without write permission shows View custom fields. Linked values outside your access show no private identity.
Click Clear record to clear a linked-record field. This keeps the linked record.
If another person saves first, Made with Pepper refuses your stale revision. Your inputs stay on screen.
Copy the inputs before reloading. Review the current values and re-enter only the changes you still want.
Use custom values elsewhere
Views expose active fields as custom_<key>. Choose them in Columns, sorting and filters.
Text uses contains or is. Numbers and money use exact comparisons. Dates, choices, checkboxes and multiple choices use their matching operators.
Files and linked records show permitted identities; they do not offer value filters. Custom fields do not create board lanes or calendar date axes.
Search includes text, phone, email, choices and compound text values inside your existing record access. Retired fields leave default search and views.
Under Merge text, enter a plain-text template such as Budget: {custom.project_budget}. Click Preview.
The result can be Budget: 1250.75 USD. Copy the text where needed. This preview sends no email and changes no issued original.
Agent connections can read scoped definitions, values and views. They can prepare editable input and a browser review link.
A prepared link performs no write. Inspect it and use the ordinary Save, Publish form, Submit form or Retire field control.
See the MCP and HTTP reference for inputs, limits and permissions.
Need help with the product?
Contact support